Using the Basic Windows 10 Backup Option
There have been many questions concerning how to effectively backup your computer system. Here is a basic method for backing up your computer system using Windows backup. The article will cover only the Windows backup: slow, reliable, generic across operating systems and versions, and fuddy-duddy. No bling bits here. It will be basic, but it will also get you there.
Getting Started
You will need several hardware devices prior to starting backups:
• At least two, probably three external hard drives for data files and folders and system images, These should be 1TB or greater storage capacity.
• Several flash drives for bootable recovery disks. When your system won’t boot, these will boot. Flash drives are fragile. Test early and often to see if they will boot. If a flash drive won’t boot, create another bootable flash drive. The key word here is bootable.
• If you have a CD/DVD drive, several CD/DVD disks for bootable recovery disks. CD disks are more robust than flash drives, but if you build them, test them periodically to see that they will boot.
The reason you want several external hard drives is to rotate them. If a backup goes bad, you have extra backups with a system image and your user files:
Day 1 External hard drive 1
Day 2 External hard drive 2
Day 3 External hard drive 3
Day 4 External hard drive 1
Day 5 External hard drive 2
With Windows backup, each external hard drive can contain:
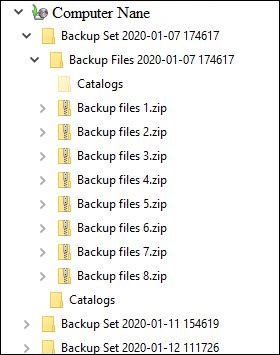
• latest system image of each of your computers (stored by computer name) and dated when the system image was created. The system image for the corresponding computer is overwritten each time a backup is made. If you wish to keep the older system image, copy it elsewhere before creating a new system image.
• multiple user file backups generated each time a backup was made. File backups are all kept by date each time a backup is made.
If you decide to keep different computers backed up on each external backup hard drive, make sure you know the name of each computer. I keep my backups separated and assigned to a specific computer.
Backing Up Your Computer
Perform the following steps to create a Windows 10 backup of your system
In the search box in the lower-left-hand corner, type: backup.
Select: Backup settings.
Select: Go to Backup and Restore (Windows 7).

Figure 1. Backup option
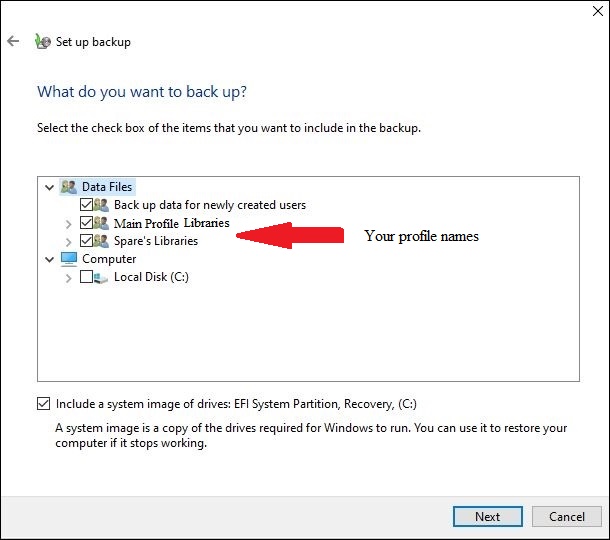
If you want a system image only, you may create one using the option in the upper left-land corner. However, another option is to create backup of user files and folders and a system image. The user files and folders are kept in dated zip files. The system image is retained with your computer name and date.
To save both user files and a system image, select: Change settings.
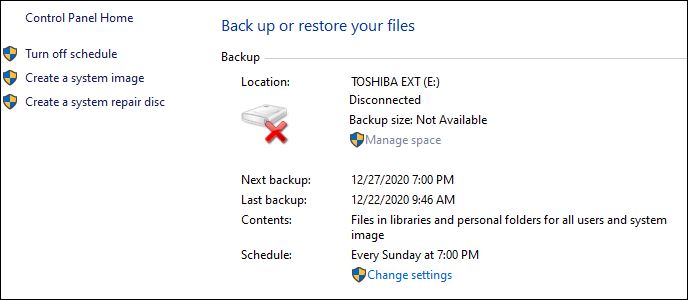
Figure 2. Select change settings
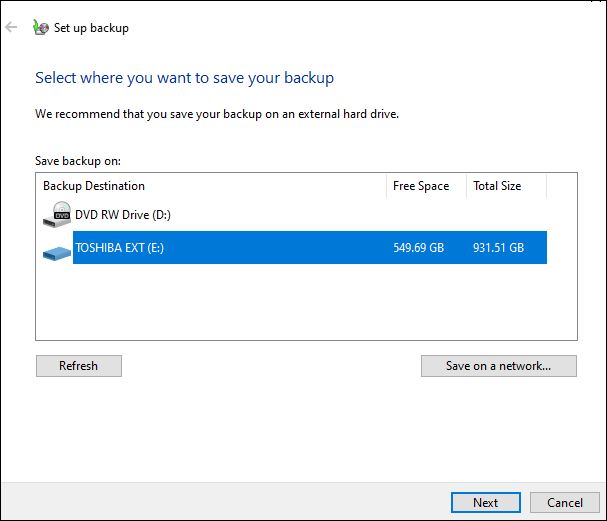
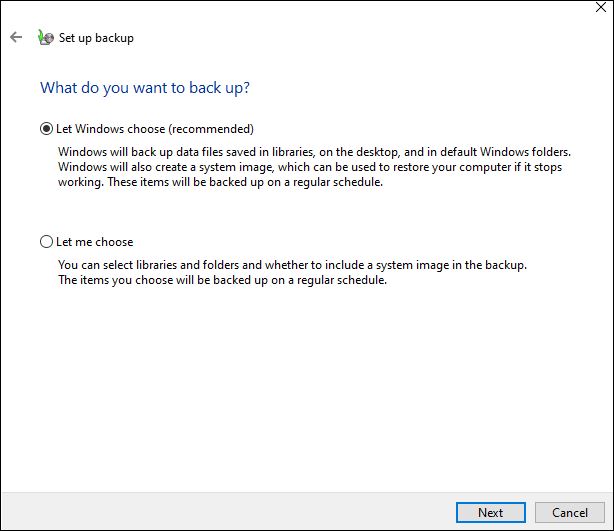
Select the drive and let Windows choose what to backup.
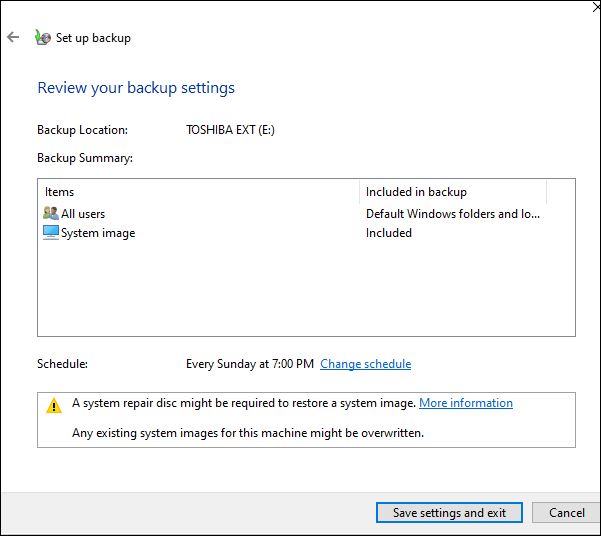
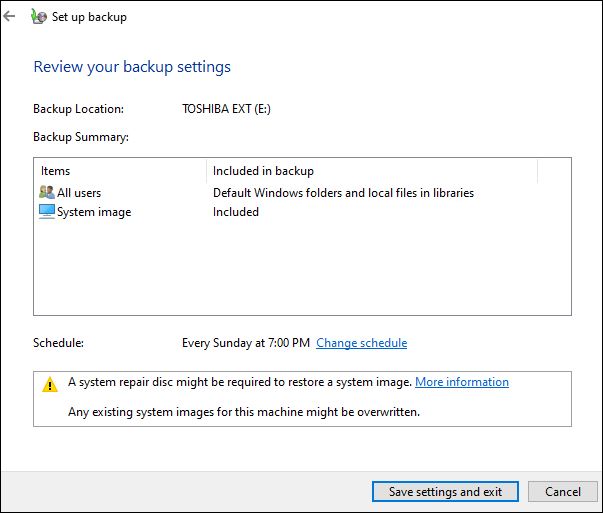
Notice that both user files will be backed up and a system image will be created.
Select: Save settings and run backup.
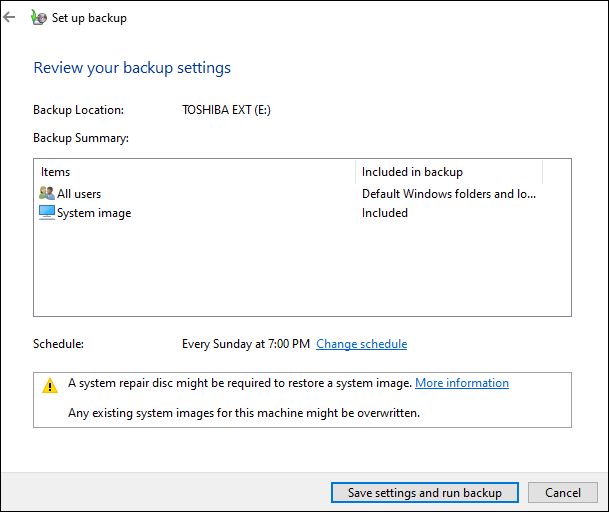
Figure 3. Backup files and folders and create system image
The backup will first create the backup user files followed by the system image. There is a green progress bar and there are blinking drive lights. A system image may take a long time and may appear to hang at 97%, but if the system seems to be working leave it alone.
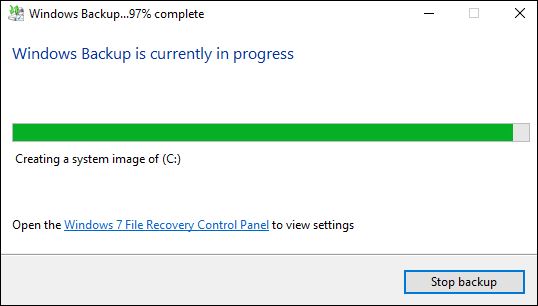
Figure 4. Creating system image in progress
You can view your information when you’re finished. To view data file backups (user files), select: View backups.

Figure 5. View results
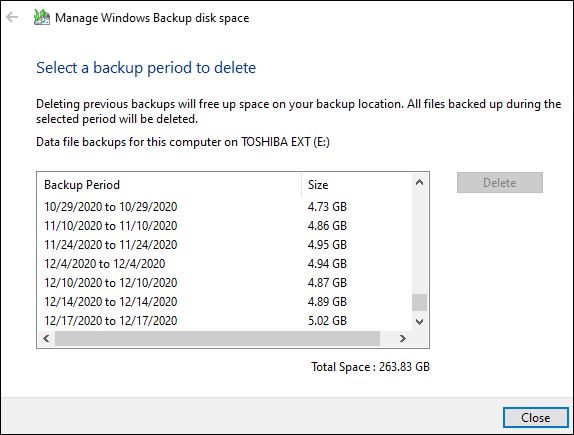
Figure 6. View data file backups
Creating Bootable Rescue Disks
Bootable rescue disks permit booting when your system disk has been damaged. In my computers, I’ve configured the booting sequence to check for flash drives and CD/DVD first such that my system automatically boots to these if there is a disk or flash device in the drive. If the drives are empty, the system boots to the default hard drive. Your backups are not bootable; your rescue disks are bootable and come in two flavors: system repair disc (CD/DVD) and recovery drive (flash drive).
For 32-bit machines, you need a 32-bit rescue disk. For 64-bit machines, you need a 64-bit rescue disk. They don’t mix.
System Repair Disc
From Figure 2, Select: Create a system repair disc.
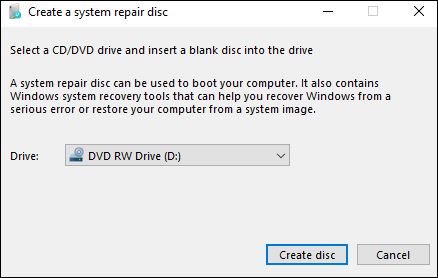
Figure 7. Create bootable rescue disk using CD/DVD drive
Recovery Drive
In the search box in the lower-left-hand corner, type: recovery drive.
I’ve found building these flash drives is slow, so be patient.

Figure 8. Select your flash drive
Test Bootable Rescue Disk
After building your bootable rescue disks, test them. There are two parts to the test:
1. Configure your system so it boots to the device. This process takes a bit of finagle to reboot and locate the “right” key to enter the BIOS, and set the boot priority. The correct key for me on this machine is “Del”; your key may be different depending on your system configuration.
2. Make sure your bootable rescue disk actually boots. If it doesn’t boot, build another bootable rescue disk.
Recovery
Recovery may consist of restoring system image or it may involve restoring user files.
System Image
If your system is able to boot, in the search box in the lower-left-hand corner, type: recovery options.
Under Advanced startup, select: Restart now.
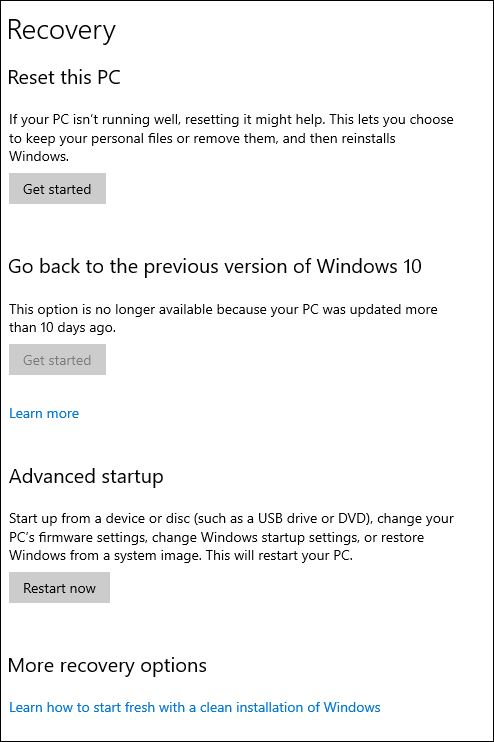
Figure 9. Recovery using system image
Select: Troubleshoot.
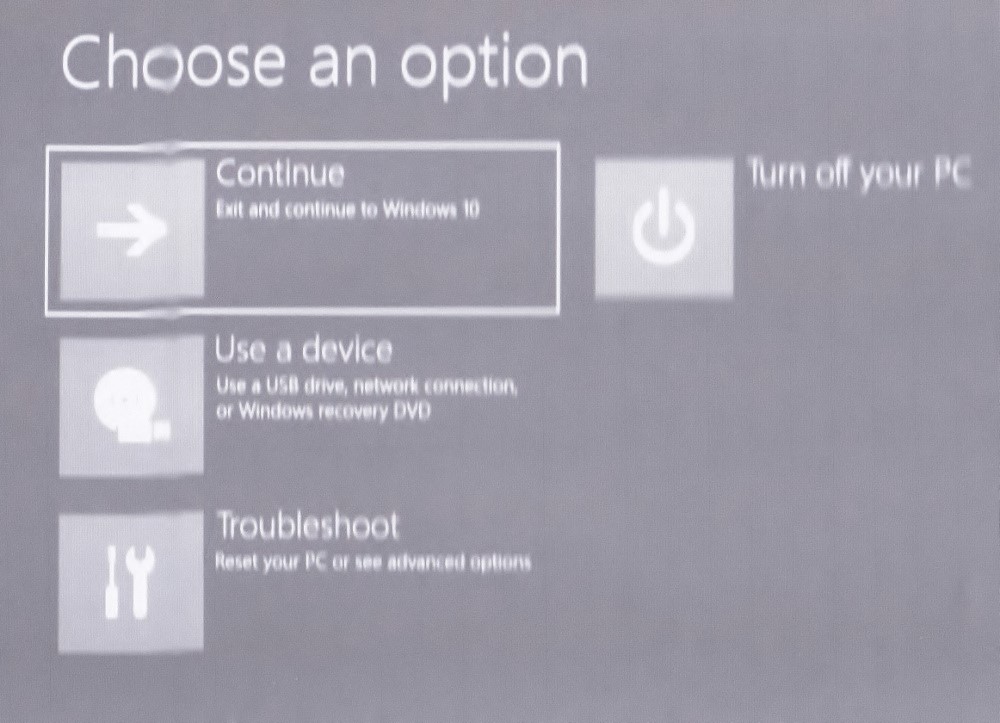
Figure 10. Select an option
Select: Advanced Options.

Figure 11. Advanced Options
You should see System Image Recovery. If not, select More Recovery Options.
Select the option to restore from system image.
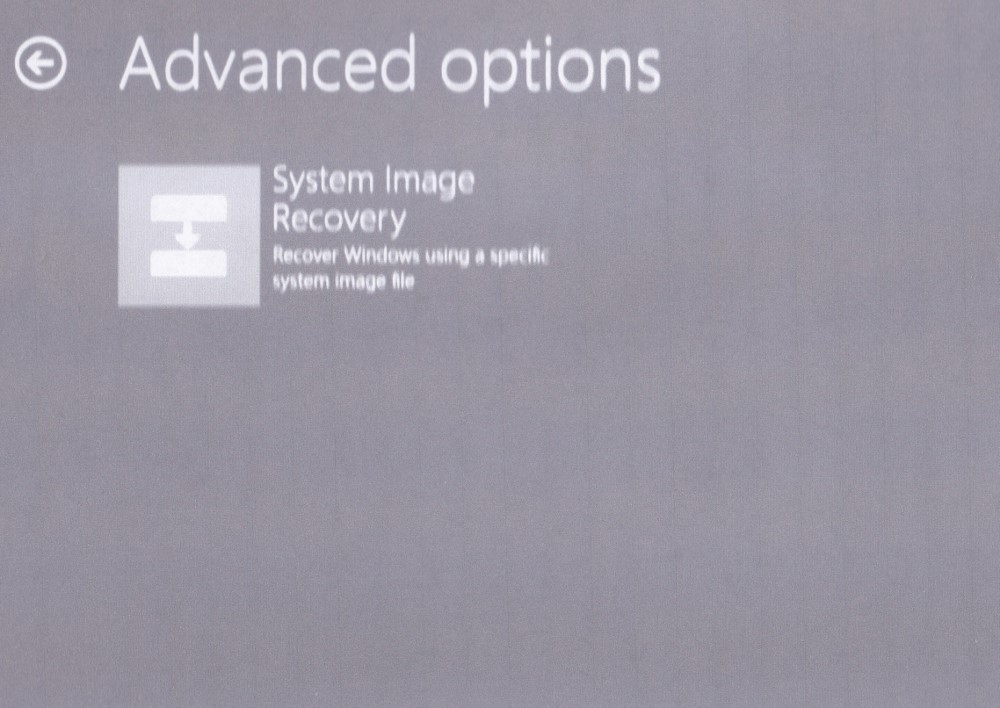
Figure 12. Restore system image
If you have multiple computers in your WindowsImageBackup, make sure you select the correct computer name for restoring your computer.
If your system is unable to boot, insert the bootable rescue disk, and boot from the rescue disk.
Select: Keyboard.
Select: User and password.
Select: Troubleshoot.
Select the option to restore from system image.
User Files
If you need to recover user files, in the search box in the lower-left-hand corner, type: backup.
Select: Backup settings.
Select: Go to Backup and Restore (Windows 7).
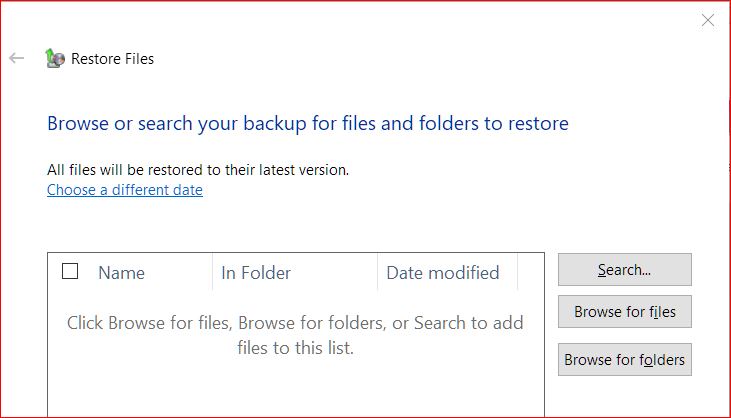
Select: Restore my files or Restore my folders.

Figure 13. Restore files and folders only
Practice making backups and bootable rescue disks. Practice booting from a bootable rescue disk and restoring a system image. Practice restoring a user file or folder. Computer emergencies rarely happen conveniently and it’s best to be prepared.
offline▸ Win10Pro 2004.19041.572 x64 i3-3220 RAM8GB HDD Firefox83.0b3 WindowsDefender
offline▸ Acer TravelMate P215-52 RAM8GB Win11Pro 22H2.22621.1265 x64 i5-10210U SSD Firefox106.0 MicrosoftDefender
online▸ Win11Pro 22H2.22621.1992 x64 i5-9400 RAM16GB HDD Firefox116.0b3 MicrosoftDefender
-
This topic was modified 4 years, 3 months ago by
.
-
This topic was modified 4 years, 3 months ago by
-
This topic was modified 4 years, 3 months ago by
.