• Setting up backup in Mint Mate 19.2 OS

    Home » Forums » AskWoody support » Linux for the Home user » Linux – all distros » Setting up backup in Mint Mate 19.2 OS

    Tags:

    Author
    Topic
    #2005825

    New Mint user, switching from Win7 HP to Mint Mate 19.2.ย  Currently running dual boot environment on Dell desktop, about to add Mint to Acer laptop, currently running Win7 HP only.ย  Looks like at this point we will keep dual-boot functionality on both machines, which are on a hard-wired/ wifi LAN and share an HP multi-function printer with its own network address.

    Attempting to set up Mint backups on the desktop, bought a new WD “My Passport” 1tb HDD for the purpose, but the Mint backup app advises that this drive cannot be used as it lacks a Linux partition.ย  I’m reading that Western Digital has not been helpful to others with this issue.

    Can this disk be set up for Mint?ย  If not, perhaps someone could point me toward a suitable external drive for this purpose, much appreciated!
    Viewing 35 reply threads
    Author
    Replies
    • #2005844

      @Slowpoke47, you should be able to reformat that WD disk to a Linux format without great difficulty. Here’s a fairly well-detailed, step-by-step description: https://www.techwalla.com/articles/how-to-format-a-hard-drive-in-linux.

      Good luck, and let us know how it goes.

      1 user thanked author for this post.
    • #2006185

      There are plenty of hits from a search for “linux backup to wd external”, like this one.
      https://forums.linuxmint.com/viewtopic.php?t=270308

      cheers, Paul

      1 user thanked author for this post.
    • #2006432

      That backup application would probably be Timeshift, given what you’ve said.ย  Rsync is the backend for non-BTRFS systems, and it needs Linux partitions to work with its hard links and permissions.ย  Windows partitions handle things differently than Linux ones, so it won’t work.

      Timeshift is a great program, and I use it often, but it’s not meant as a full disaster recovery backup program, like if the hard drive dies or the PC is stolen. It does not, by default, back up your personal files, and mn- has already described some of the issues that can happen if files change during the backing up process.

      For full disaster recovery type backups, I use Veeam, which is roughly analogous to Macrium Reflect, except it runs natively on Linux.ย  It may work with your NTFS formatted drive.ย  Reformatting it to a Linux file system is easy, but it will wipe out what is already on it, so be aware of that.ย  Others have already posted links to how-tos, so that should work for you!

      If you would like to try Veeam (it’s free for home users), let me know and I will help if you need more info.ย  The Veeam site has a small .deb installer that will work on Mint by simply double-clicking the icon for the file, and that will install Veeam’s repository in your PC’s updater.ย  After that, you can use the software installer (whatever it’s called in Mint, I don’t remember!), Synaptic package manager, or the command line to install the veeam package, which will install the full Veeam (Agent) backup program.

      To run veeam, open a terminal window, then type ‘sudo veeam’ and hit enter, then your password.ย  That will start the program… it’s menu/wizard driven, so you can just follow the wizard and get it set up.ย  It won’t work with the mouse, but you can use the arrow keys to move the selection cursor around, space to select, and enter on the buttons for back and forward.


      Dell XPS 13/9310, i5-1135G7/16GB, KDE Neon 6.2
      XPG Xenia 15, i7-9750H/32GB & GTX1660ti, Kubuntu 24.04
      Acer Swift Go 14, i5-1335U/16GB, Kubuntu 24.04 (and Win 11)

      2 users thanked author for this post.
    • #2006451

      I’m still getting “settled into” Mint. At this point, I’ve accumulated a few user files, and the updater reminds me whenever I install updates to set a backup plan.ย  After my recent near-death experience with the Win7 system, I don’t need any convincing!ย  The disk I plan on using is brand new, no personal data on it, looks like it came with Windows and Mac setup files.ย  This drive will be for Mint only, a single partition, so I would reformat the whole thing for Mint.

      With the new disk in hand, I followed the prompts from the Mint updater pop-up to the point at which I learned that the disk was not suitable out of the box. My next move was to start this thread.

      For full disaster recovery type backups, I use Veeam, which is roughly analogous to Macrium Reflect, except it runs natively on Linux.

      This sounds good to me.ย  I was planning to use the link posted above by Cybertooth to get the drive ready- is that still the first step if I go with Veeam?

      f you would like to try Veeam (itโ€™s free for home users), let me know and I will help if you need more info. The Veeam site has a small .deb installer that will work on Mint by simply double-clicking the icon for the file, and that will install Veeamโ€™s repository in your PCโ€™s updater. After that, you can use the software installer (whatever itโ€™s called in Mint, I donโ€™t remember!), Synaptic package manager, or the command line to install the veeam package, which will install the full Veeam (Agent) backup program.

      When the drive is reformatted and Veeam is downloaded, I’ll gladly accept your offer if/when I run into a snag!

    • #2006458

      Followed the prompts on the Veeam site- downloaded two files:

      Screenshot-at-2019-11-16-17-52-42

      These are the entries in the download folder:

      Screenshot-at-2019-11-16-17-56-42

      Was this correct?

      1 user thanked author for this post.
    • #2006664

      Using Cybertooth’s link above, steps 1-3 are simple enough:

      Screenshot-at-2019-11-17-05-31-21
      Notice the last line, .mount does not exist, proceeding anyway

      Generates this pop-up:

      Screenshot-at-2019-11-17-08-20-14

      Step 4 advises, from the Gparted menu, select the device you connected, identified by size.ย  Three items are shown under Gparted>Devices:

      /dev/sda (931.51 GiB)ย  ย ย  this item preselected

      /dev/sdb (298.09 GiB

      /dev/sdg (931.51 GiB)

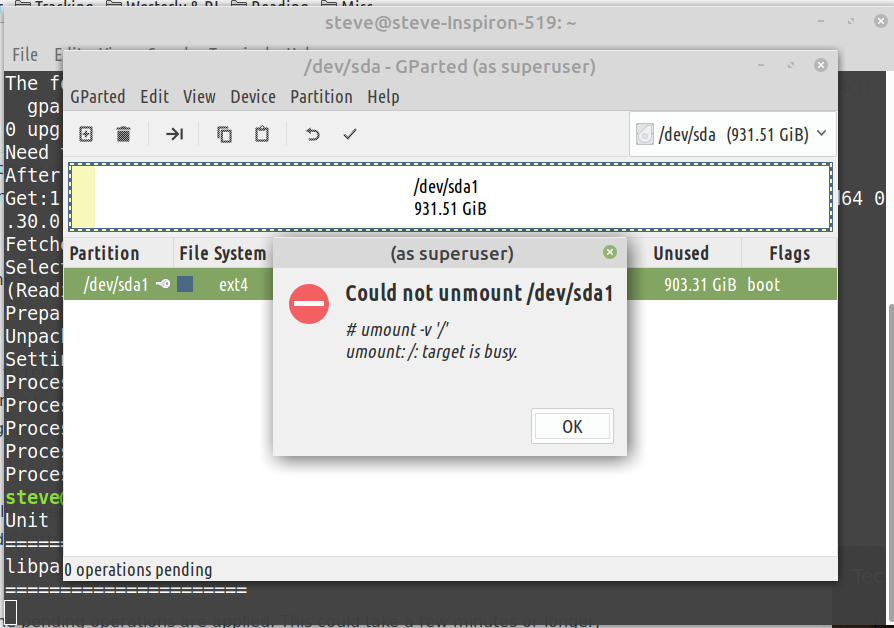
      From this point, I have not generated anything that corresponds to the remainder of the steps.ย  At this point, the entire menu under Partition, center top, is ghosted.ย  If I select the drive (the only item in the main menu, as shown), the unmount option in that list is available, and generates this message:

      Screenshot-at-2019-11-17-05-33-29
      So at this point, I’m stuck.ย  Where am I going wrong?
       

      • #2006790

        @slowpoke47, this is where things get a bit tricky (at least for me) because Linux doesn’t use the C:, D:, E: drive letter designations that are so familiar to us in Windows.

        The drive that Mint is designating as “sda” will typically be the boot drive. (I see that @wavy has addressed this point–thanks!) Other drives will be “sdb,” “sdc,” and so on.

        What you want is to identify the WD My Passport external USB drive that you wish to reformat. I’m guessing that it’s what Mint has labeled “sdg” in your post above, but you need to make darn sure of it before proceeding with the reformat. What might be that 298GB “sdb” drive, and (to avoid confusion or disaster) can you disconnect it from the computer before trying to reformat the WD drive?


        1 user thanked author for this post.
        • #2006837

          this is where things get a bit tricky (at least for me) because Linux doesnโ€™t use the C:, D:, E: drive letter designations that are so familiar to us in Windows.

          The drive that Mint is designating as โ€œsdaโ€ will typically be the boot drive. (I see that @wavy has addressed this pointโ€“thanks!) Other drives will be โ€œsdb,โ€ โ€œsdc,โ€ and so on.

          This is quite right, but there’s a one difference that needs to be mentioned.

          Windows drive letters are assigned to volumes, while Linux designations ofย  “sda” and “sdb” (and so on) always refer to physical hard drives.

          A volume is basically a partition… though they are not exactly the same, they’re close enough to think of them that way for convenience.ย  A partition is like a box, while the volume is like the contents of the box, including the space inside the box.ย  I tend to use them semi-interchangeably too, even if it is not 100% accurate.ย  Just know that if you see the term “volumes,” that’s what it means.

          In Windows, you can have a single hard drive set up with three partitions, and the volumesย  would normally be C:, D:, and E:. You could also have three physical hard drives with one partition each, and those volumes would be C:, D:, and E: also.ย  There’s no way to know from the drive letter which volumes are on what physical drive, and usually, you don’t need to.

          In Linux, each physical drive gets a name.ย  If you’re using SCSI, SATA, or USB drives, they will be called “sdX,” where sd stands for SCSI device, and X will be a letter assigned in the order the system discovers the drives, starting with a.ย  If it is another type of drive, like a NVMe or eMMC drive, it will not be called sdX.

          Each partition on a given drive is designated by the name of the drive plus a number.ย  The first partition on sda will be sda1.ย  If you had three partitions on one hard disk, they would be sda1, sda2, and sda3, while if you had three separate hard drives with one partition each, they would be sda1, sdb1, and sdc1.

          It’s good to know what to look for to make sure you’ve got the right drive.ย  In this case, if you look in the screenshot, you can see that Gparted says the single partition on the drive (sda1) is mounted as / (root).ย  That’s where Linux is installed, so while you are using Linux, it won’t let you unmount the drive, because you are using it to run Linux.ย  That’s what it means when it says the partition is busy.

          We know that the external drive is 1TB, and it can’t be sda, since that’s the drive that contains the root partition (sda1), so it has to be sdg, as Cybertooth wrote.

          The Gnome Disks utility, which you can find by typing ‘disks’ into the search field of the main or application menu (what would be called the start menu in Windows), makes it a little bit easier to visualize all the drives, as it shows them all at once in the left-hand pane within the Disks window.ย  The WD Drive will probably be easier to recognize that way.

          The drive sdb is probably the Windows drive.


          Dell XPS 13/9310, i5-1135G7/16GB, KDE Neon 6.2
          XPG Xenia 15, i7-9750H/32GB & GTX1660ti, Kubuntu 24.04
          Acer Swift Go 14, i5-1335U/16GB, Kubuntu 24.04 (and Win 11)

          2 users thanked author for this post.
          • #2006848

            Oh, you can also go look in /dev/disk/by-id/ or /dev/disk/by-path/ – those get filled with symlinks to the sdX devices and such.

            Especially the by-path one is interesting for those who have numbered SATA connectors on the motherboard and may need to figure out which one goes where.

            And these are supposed to be persistent without regard to other devices or initialization order.

            1 user thanked author for this post.
    • #2006770

      forgive my butting in BUT is not that your boot / os drive you are attempting to format?
      In which case you are lucky it is not working. Maybe try the drop down menu on the upper right to find the drive you actually want to partition. disclaimer: NOT a Linux guru….๐Ÿ˜”

      ๐Ÿป

      Just because you don't know where you are going doesn't mean any road will get you there.
      3 users thanked author for this post.
    • #2006835

      What you want is to identify the WD My Passport external USB drive that you wish to reformat. Iโ€™m guessing that itโ€™s what Mint has labeled โ€œsdgโ€ in your post above, but you need to make darn sure of it before proceeding with the reformat.

      Also gparted has that “View” menu. I suggest turning on View -> Device Information so you can check model and serial numbers. Should open a side pane.

      You could also pay attention to the mount point information if it’s shown. Fairly fundamental information on Linux that “/” is your currently running system disk. USB media may be autoattached to places like /media/user/something and normally can be unmounted using that button if you’re not actively using anything there. (Having a terminal window open in there counts as active.)

      The drive that Mint is designating as โ€œsdaโ€ will typically be the boot drive. (I see that @wavy has addressed this pointโ€“thanks!) Other drives will be โ€œsdb,โ€ โ€œsdc,โ€ and so on.

      Typically but by no means certain, and you can’t rely on that not changing between boots either. It goes by initialization order, so if your motherboard is built to do USB before (some) SATA …

      (Mine does exactly this. The normal SATA slot is always sda, then any USB drives present during bootup, and only then the mSATA slot where I have my / … yes, I have a larger spinning drive in the normal SATA slot and a smaller faster SSD in the mSATA. Also gparted doesn’t show where I keep my / because of my encryption setup…)

      4 users thanked author for this post.
    • #2006910

      Thanks to all who posted and saved me from myself yet again…

      New disk is now formatted and ready to use.ย  The key piece of info was to check the i.d. details for the two 1tb disks- it didn’t dawn on me that the three devices were the three HDD’s- that’s why I’m a Slowpoke.

      If you would like to try Veeam (itโ€™s free for home users), let me know and I will help if you need more info. The Veeam site has a small .deb installer that will work on Mint by simply double-clicking the icon for the file, and that will install Veeamโ€™s repository in your PCโ€™s updater. After that, you can use the software installer (whatever itโ€™s called in Mint, I donโ€™t remember!), Synaptic package manager, or the command line to install the veeam package, which will install the full Veeam (Agent) backup program.

      Tomorrow I’ll try to get the Veeam program set up.ย  If I can’t do that either, I’ll be back.

    • #2008444

      If you would like to try Veeam (itโ€™s free for home users), let me know and I will help if you need more info. The Veeam site has a small .deb installer that will work on Mint by simply double-clicking the icon for the file, and that will install Veeamโ€™s repository in your PCโ€™s updater. After that, you can use the software installer (whatever itโ€™s called in Mint, I donโ€™t remember!), Synaptic package manager, or the command line to install the veeam package, which will install the full Veeam (Agent) backup program.

      A little gun-shy, could use some advice.ย  .deb installer installed ok, but cannot get to the next step.ย  As far as I can see, Software Manager is the utility for… installing software!ย  Selecting this menu item brings up a screen offering a multitude of software, I think maybe pre-installed on the OS, Veeam not shown.ย  Typing “veeam” into the search box displays the .deb installer with the option to uninstall.ย  The new drive is connected and found by the Mint OS.

      Entered “sudo veeam” in the command window, says “command not found” likely because the actual Veeam program is not yet installed.ย  What’s next?

      • #2008535

        .deb installer installed ok, but cannot get to the next step. As far as I can see, Software Manager is the utility forโ€ฆ installing software! Selecting this menu item brings up a screen offering a multitude of software, I think maybe pre-installed on the OS, Veeam not shown. Typing โ€œveeamโ€ into the search box displays the .deb installer with the option to uninstall.

        Sounds like you forgot to update the available packages listing.

        The “veeam-release” package only contains the repository definition for Veeam so that on the next run your system will also check that for available packages.

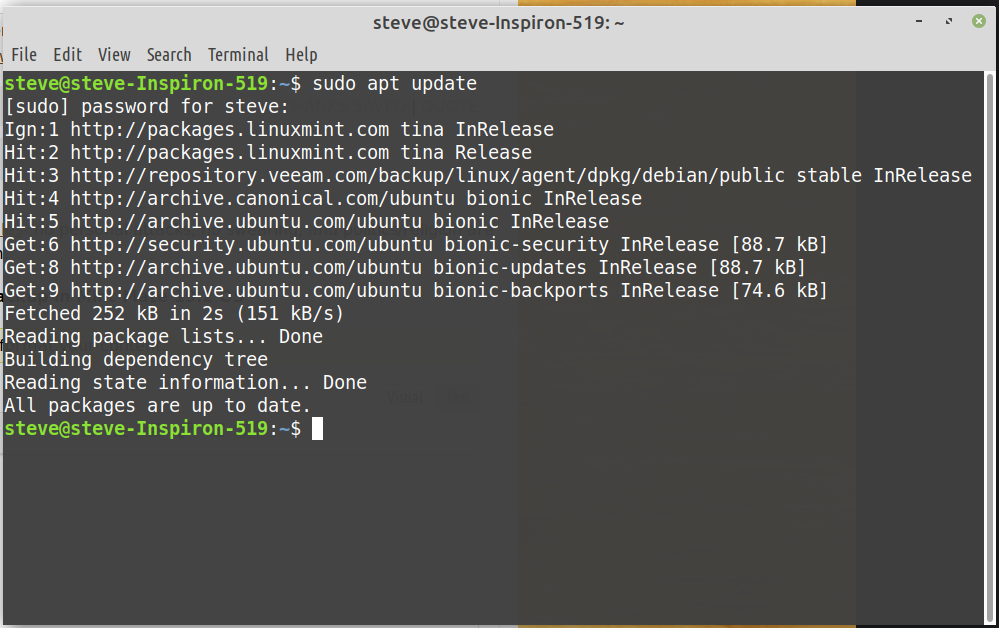
        Try “sudo apt update” (or the equivalent on the graphical side) and after that you should have also “veeam” and “veeamsnap” packages available for installing.

        1 user thanked author for this post.
    • #2008575

      Sounds like you forgot to update the available packages listing.

      More like, never knew to do that.

      Try โ€œsudo apt updateโ€ (or the equivalent on the graphical side) and after that you should have also โ€œveeamโ€ and โ€œveeamsnapโ€ packages available for installing.

      Once I have done this, would I be using both packages?ย  If so, in which order?

      • #2008618

        Once I have done this, would I be using both packages? If so, in which order?

        Install “veeam”, it’ll pull in “veeamsnap” as a dependency.

        That way, if they’ll later need to distribute patches to their product, they can replace just one of those.

        More like, never knew to do that.

        Increasingly rare to have to do that manually in a default configuration anyway. There’s a bunch of directions the package management is going and this is one where it’s currently moving towards “ease of use” and away from “optimized for datacenters”.

        1 user thanked author for this post.
        • #2009723

          Sometimes it takes a while for the changes to filter their way into the graphical tools, even if you hit the button to reload.ย  I’ve often added a new repo or PPA and found that whatever it is supposed to offer isn’t shown in Synaptic or Muon, even after several “reload” button presses.ย  The standard “sudo apt install xxxx” always works, though.

          In your case, Slowpoke47, if you haven’t gotten it installed yet, try entering this in the terminal:

          sudo apt update

          and press enter, then enter your password. EDIT: I see below you already did that, so no need to do it again.

          Next, type or copy/paste this (and hit enter, of course.ย  I am sure you already know that, so apologies if I am inadvertently insulting you in stating it explicitly, but I want to make sure it’s clear just in case):

          sudo apt install veeam

          It should just do it without asking for the password again, since the password for sudo is cached for a short time.

          If you look again now, veeam may appear in the graphical tool.ย  It gets there, eventually!

          The delay in the graphical tools could have to do with the xapian issue that graphical apt tools have where it feels the need to rebuild the index all the time.ย  Just a shot in the dark, but it seems plausible.


          Dell XPS 13/9310, i5-1135G7/16GB, KDE Neon 6.2
          XPG Xenia 15, i7-9750H/32GB & GTX1660ti, Kubuntu 24.04
          Acer Swift Go 14, i5-1335U/16GB, Kubuntu 24.04 (and Win 11)

          • This reply was modified 5 years, 4 months ago by Ascaris.
          2 users thanked author for this post.
    • #2008631

      Try โ€œsudo apt updateโ€ (or the equivalent on the graphical side) and after that you should have also โ€œveeamโ€ and โ€œveeamsnapโ€ packages available for installing.

      See screenshot- followed the above suggestion.

      Screenshot-at-2019-11-20-16-20-32
      But opening Software Installer and typing “veeam” into the search box still shows only the .deb program, already installed.ย  What am I missing?

      1 user thanked author for this post.
      • #2008680

        But opening Software Installer and typing โ€œveeamโ€ into the search box still shows only the .deb program, already installed. What am I missing?

        Well. I’m not sure what Mint uses for the graphical tool but I don’t use those much anyway.

        I remember that at one point I had a case where the different tools’ versions of the package listing caches got out of sync, but that was years ago. Still, would check that the graphical tool’s cache has updated too.

        Anyway. After that update (with the http://repository.veeam.com/… line in there like it should be), I’d expect being able to do this…

        $ apt-cache search veeam
        veeam - Veeam Agent for Linux
        veeam-release-deb - Veeam Backup for GNU/Linux repository
        veeamsnap - Veeam Agent for Linux (kernel module)
        

        … don’t have to use sudo just to list cache, after all…

        Once it’s listed it should also be installable.

        1 user thanked author for this post.
    • #2008951

      Anyway. After that update (with the http://repository.veeam.com/โ€ฆ line in there like it should be), Iโ€™d expect being able to do thisโ€ฆ $ apt-cache search veeam veeam – Veeam Agent for Linux veeam-release-deb – Veeam Backup for GNU/Linux repository veeamsnap – Veeam Agent for Linux (kernel module) โ€ฆ donโ€™t have to use sudo just to list cache, after allโ€ฆ Once itโ€™s listed it should also be installable.

      Thanks, obviously you are well familiar with Linux.ย  As a Mint newbie, I have a couple of questions-ย  Does the target HDD need to be connected while running this script? and, once I run the script, what do I do to install, or set up, the Veeam program?

      • #2008993

        Thanks, obviously you are well familiar with Linux.

        Actually this part was a bit more narrow than just “Linux” … anything with .deb packages is specific to distributions, Debian and descendants including Ubuntu and Mint.

        Does the target HDD need to be connected while running this script? and, once I run the script, what do I do to install, or set up, the Veeam program?

        No, target HDD doesn’t need to be connected while doing the apt-based install. Installation is the “sudo apt install veeam” command or the graphical equivalent.

        After being installed, when starting normally (as in just plain “sudo veeam”), Veeam free version does start with an interactive textmode application where you’re supposed to configure it. At that point you do need the target device.

        It’ll offer to add the backup to cron (scheduler) too, IIRC.

        (Yeah, I’ve poked around with Veeam on my own system and noticed that when the documentation says my somewhat complicated btrfs/lvm/crypto setup isn’t supported, they really do mean it…)

        1 user thanked author for this post.
        • #2009326

          Hi,

          my somewhat complicated btrfs/lvm/crypto setup isnโ€™t supported,

          Would you describe your setup, please? Is it BTRFS over dm-crypt?

          Have you posted a feature request on Veeam forums?

          • #2009356

            Would you describe your setup, please? Is it BTRFS over dm-crypt?

            Btrfs over LVM over dm-crypt on /, Btrfs over dm-crypt over LVM on /home and some other mountpoints, and XFS over dm-crypt over LVM on some, split between a mSATA SSD and a SATA hybrid SSHD.

            (Yes, there’s a reason for each of those separate details…)

            Oh and since it’s an old high-end laptop with buggy firmware, the boot setup and partition layout is a MBR/Legacy and GPT/UEFI hybrid. Overlapping partition table entries from two different tables, heh.

            Have you posted a feature request on Veeam forums?

            Figured that this is probably just too weird to be supportable in the general case, especially the firmware bugs.

            I can still manually specify what volumes I want backed up so I *could* use Veeam, just not the easy automated method. So, for my particular case, Veeam Free has no meaningful advantage over traditional open-source tools.

            • #2009412

              Btrfs over LVM over dm-crypt on /

              I am curious about this part – why to place BTRFS over LVM? AFAIK btrfs can be extended/resized, and provides it’s own snapshots, hence my question…

              Overall, for complex setups there is a snapshot-less file-level mode in veeam agent which works with virtually anything (including network filesystems)

            • #2009568

              I am curious about this part โ€“ why to place BTRFS over LVM?

              Because I’m an old HP-UX admin and therefore use LVM for everything out of habit? Also that way I only have to unlock *one* block device whether waking from hibernate or normal bootup.

              I took some ideas from https://albertodonato.net/blog/posts/full-disk-encryption-with-btrfs-on-ubuntu-xenial.html for example.

              Also I had to redo the disk geometry (see the reference about hybrid partition tables) a few times to work around this and that, including the firmware weirdness. Nothing in btrfs to replace good old pvmove, don’t want to have to reboot just because I move my / to a completely different device…

              , for complex setups there is a snapshot-less file-level mode in veeam agent which works with virtually anything (including network filesystems)

              Yes, but I don’t actually need Veeam for that and I know how to use tar (etc.) with snapshots.

    • #2009372

      $ apt-cache search veeam veeam – Veeam Agent for Linux veeam-release-deb – Veeam Backup for GNU/Linux repository veeamsnap – Veeam Agent for Linux (kernel module) โ€ฆ donโ€™t have to use sudo just to list cache, after allโ€ฆ Once itโ€™s listed it should also be installable.

      Entered the first line of this script, pressed enter, other 3 lines self-generated.ย  What do I do with this?ย  How do I proceed to actually install the Veeam program?

      • #2009399

        … actual install from the command line when package is known and available (as it now should be),

        sudo apt install veeam

        Alternative equivalent command: sudo apt-get install veeam

        Entered the first line of this script, pressed enter, other 3 lines self-generated.

        Usual convention is, $ is the shell prompt for normal users. Lines beginning with this are commands you input.

        Lines with no prompt are things you don’t input, as in expected output from previous command etc…

        Hence, you entered the command on the $ line, and that command then produced output.

        1 user thanked author for this post.
    • #2009907

      In your case, Slowpoke47, if you havenโ€™t gotten it installed yet, try entering this in the terminal: sudo apt update and press enter, then enter your password. EDIT: I see below you already did that, so no need to do it again. Next, type or copy/paste this (and hit enter, of course. I am sure you already know that, so apologies if I am inadvertently insulting you in stating it explicitly, but I want to make sure itโ€™s clear just in case): sudo apt install veeam It should just do it without asking for the password again, since the password for sudo is cached for a short time. If you look again now, veeam may appear in the graphical tool. It gets there, eventually! The delay in the graphical tools could have to do with the xapian issue that graphical apt tools have where it feels the need to rebuild the index all the time. Just a shot in the dark, but it seems plausible.

      My thanks for this post, and, for sure, no offense taken.ย  My computer knowledge has multiple gaps, and from time to time I commit inadvertent sabotage on the system.

      Busy elsewhere yesterday, back to this today.

    • #2009950

      Following the sequence posted by Ascaris- seems like Veeam successfully downloaded:Veeam-install-screenshot1
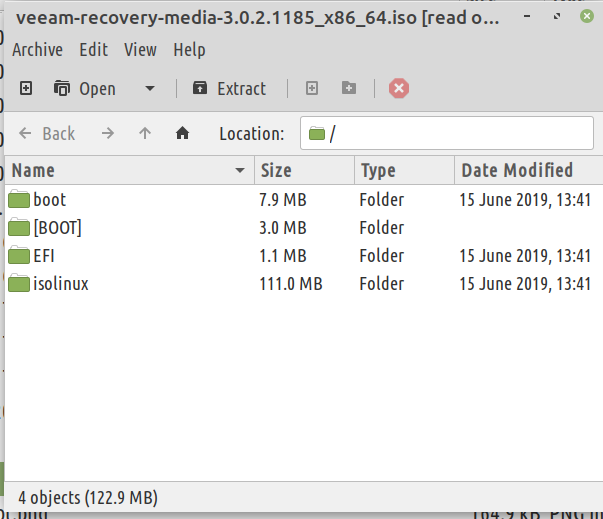
      Rebooted, connected target drive.ย  Eventually got here:Archive-Mgr-4-objects
      Selected Open>Archive Manager, got dialog box asking for type of file to open, typed .iso, brought me back to the Archive Manager pop-up.ย  Not sure where to go from here…

      • #2009980

        @slowpoke47, the answer to your question of “where to go from here” depends on what you are trying to do at this stage.

        I don’t have any experience with Veeam, but it looksย  to me like what you did up there was to ask Veeam to show you any existing image (.ISO) files so that you could inspect (browse) their contents. At least, that’s what the name of the “Archive Manager” menu item suggests to me. And in fact, in your second screenshot you seem to be looking at an ISO file that would go on a rescue CD or rescue USB stick.

        So, are you seeking to manage/examine existing backup files (.ISOs), or are you seeking to create a backup file? I suspect you’re trying to do the latter, in which case you will need to go back to the main menu in Veeam and look for a menu item that’s labeled something like “create backup”. What does the main menu in Veeam look like?


        1 user thanked author for this post.
    • #2009982

      So, are you seeking to manage/examine existing backup files (.ISOs), or are you seeking to create a backup file? I suspect youโ€™re trying to do the latter, in which case you will need to go back to the main menu in Veeam and look for a menu item thatโ€™s labeled something like โ€œcreate backupโ€. What does the main menu in Veeam look like?

      Trying to install Veeam as my backup program- Program Manager shows no results for Veeam. Software Manager shows the Veeam .deb folder only.ย  If I type Veeam into the Start menu search box, this pop-up id displayed:Veeam-from-Start-menu
      The last item on that list is the screenshot posted earlier of the results using Ascaris’ previous instructions.ย  If I double-click the first item, VLC Player is displayed, but I couldn’t make anything happen from that screen.

      1 user thanked author for this post.
      • #2009985

        Oh, I think I get it now. The second screenshot in your previous post wasn’t for Veeam, it was for your file manager program, right?

        Looks to me like Veeam has not yet actually been successfully installed? From reading the thread, I gather that at some point you tried installing Veeam by double-clicking on the .DEB file? That would be one normal way of installing software in a Debian Linux distribution like Mint. As to why it’s not showing up in your list of installed programs, I can’t imagine. Maybe something went wrong during installation. For my next step I would consider uninstalling Veeam and then reinstalling it by double-clicking on the .DEB file.

        Perhaps Linux experts can step in to diagnose what’s going on here.


        • This reply was modified 5 years, 4 months ago by Cybertooth.
        1 user thanked author for this post.
      • #2010061

        The .iso file is the rescue media, which you would want to burn to a disc or a USB thumb drive, so you can use that if something happens and you need to restore the backup.ย  That’s not the main program installed on the computer.

        Veeam won’t appear in the application menu normally.ย  I didn’t mention that bit in my post above (oops, sorry), but I did mention how to start it. In my mind, the bit about it starting from the command line meant that it wouldn’t be in the menu, but I can see how that might not be evident to someone not familiar with the command line.

        Veeam agent does not have a graphical UI, but it is wizard/menu-driven, so you don’t have to try to remember any commands to use it.ย  To use it, simply open a terminal window, and type

        sudo veeam

        and hit enter, which will start the program (after you enter the password).ย  Use the arrow keys to move the selection cursor, space to select an option, and enter to press the forward or back buttons.

        It should be possible to create a .desktop file that would allow it to be shown in the menu.ย  KDE, the desktop environment I use, has a menu editor that will quickly allow me to add programs to the menu and create the .desktop files, but I don’t know whether MATE has something like that.

        I can walk you through creating one manually if you want to try!


        Dell XPS 13/9310, i5-1135G7/16GB, KDE Neon 6.2
        XPG Xenia 15, i7-9750H/32GB & GTX1660ti, Kubuntu 24.04
        Acer Swift Go 14, i5-1335U/16GB, Kubuntu 24.04 (and Win 11)

        • This reply was modified 5 years, 4 months ago by Ascaris.
        3 users thanked author for this post.
        • #2010065

          Thanks for the advice in terms I can (mostly) understand.ย  Cannot spend any more time on this today, but plenty of time to do this (or, screw it up!) tomorrow.

          My goal is to set up a regular backup schedule, similar to the Macrium one that recently saved my bacon.ย  I’ll use your guidance to attempt it then.

    • #2010036

      Oh, I think I get it now. The second screenshot in your previous post wasnโ€™t for Veeam, it was for your file manager program, right?

      That popup was the result of typing “veeam” into the search box on the Start menu.ย  I’m pretty much in the dark, but I believe the file is downloaded, see my earlier screenshot: ย  /home/steve/Downloads/veeam-recovery-media-3.0.2.1185_x86_64.iso

      That is the first item in that popup.ย  But I don’t know how to install it.ย  If I double-click it, VLC Media Player opens, but that seems to be a dead end, and in any case, I don’t think that program can install software.

      • #2010038

        I’m not familiar with Linux or the Veeam software.
        That may not be the Veeam program installer.
        If I had to guess, I’d say the ISO would make bootable Recovery Media.
        Burn it onto a CD/DVD (depending on size) or a bootable USB drive.
        Then you can boot from the Recovery Media.

        2 users thanked author for this post.
      • #2010055

        @slowpoke47, try listing that file named “veeam-release-deb_1.0.7_amd64.deb” from your “Start” menu again and then double-click on it. If I remember correctly, a .DEB file is equivalent (in Debian-based Linux distros) to the “setup.exe” types of files that we see in Windows installer programs.

        I’m thinking that Veeam has not been successfully installed on your system, so you should be able to simply double-click on that .DEB file to install Veeam. (That is, as opposed to needing to uninstall anything prior to the installation.)


        1 user thanked author for this post.
    • #2010063

      @slowpoke47, try listing that file named “veeam-release-deb_1.0.7_amd64.deb” from your “Start” menu again and then double-click on it. If I remember correctly, a .DEB file is equivalent (in Debian-based Linux distros) to the “setup.exe” types of files that we see in Windows installer programs.

      I’m thinking that Veeam has not been successfully installed on your system, so you should be able to simply double-click on that .DEB file to install Veeam. (That is, as opposed to needing to uninstall anything prior to the installation.)


      Any thoughts on the Command Line screenshot I posted earlier?ย  As you can see by the “slider” on the right edge, the entire screen is not visible there, but I started with the sudo apt install veeam command as advised by Ascaris earlier.

      In the All Programs menu, nothing related to Veeam is listed.ย  Perhaps I should start over in the Command window with the sudo apt-get install veeam command?

      EDIT- This post crossed with Ascaris, can’t seem to delete it.


      1 user thanked author for this post.
      • #2010066

        @slowpoke47, Ascaris’s suggestion of “sudo veeam” is better than mine: I didn’t realize that Veeam has no GUI, so no wonder it looked like it hadn’t been installed when it failed to show up in your “Start” menu.

        Try Ascaris’s advice and you’re probably good to go.

        Regarding what you saw in the command line screenshot, I’ll leave that to Linux connoisseurs to explain as I’m not all that familiar with the Linux command line.


        1 user thanked author for this post.
        • #2010102

          Veeam has no GUI,

          Indeed, what you get with “sudo veeam” is a character-mode application. It’s a full-screen one though (full window if running in a terminal window) and tries to use pseudo-graphical elements.

          (This is the usual thing that the curses/ncurses fullscreen text libraries are used for.)

          On a first run it should ask about licenses (paid version is a key-based upgrade), and also offer to customize the Veeam recovery bootable .iso to include any special drivers you may have… relevant to at least those with hardware RAID.

          And then you get to define a backup job, set a schedule and run it.

          3 users thanked author for this post.
    • #2010295

      Veeam agent does not have a graphical UI, but it is wizard/menu-driven, so you donโ€™t have to try to remember any commands to use it. To use it, simply open a terminal window, and type sudo veeam and hit enter, which will start the program (after you enter the password). Use the arrow keys to move the selection cursor, space to select an option, and enter to press the forward or back buttons.

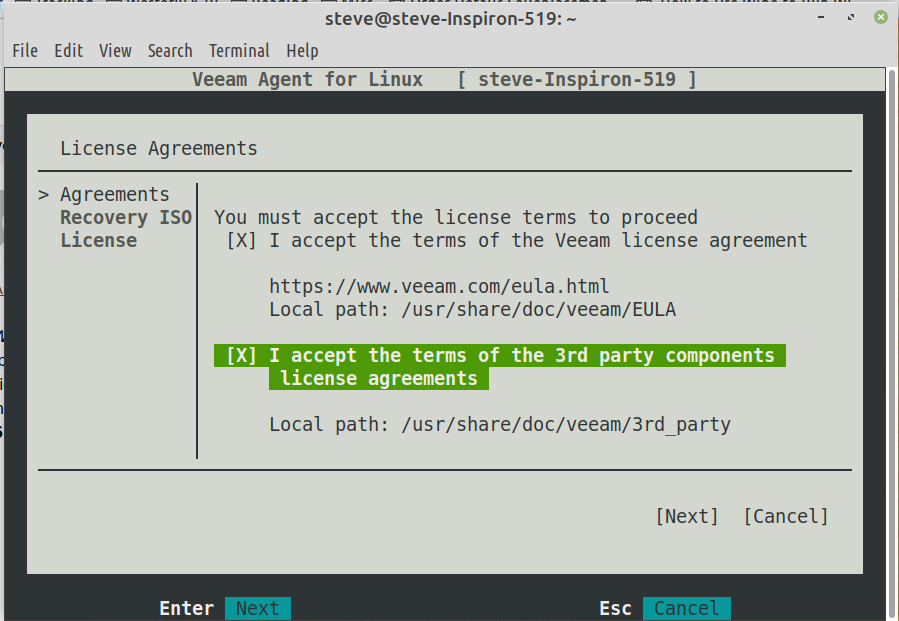
      Got started ok, able to check both “accepted” items using space bar and arrow keys:1st-s-shot

      Pressed “enter”-this screen displays:2nd-s-shot
      This system (Mate) is slightly different from Ascaris’- there is limited function of mouse and cursor- but in this screen can’t open “browse” function- able to highlight it using mouse and double click (no response from single click) but no response.ย  Also, can’t type in black text box, don’t know what I would type there anyway.

      Pressing “enter” from here displays error message:3rd-s-shot
      So, I’m stuck.ย  Could not make anything useful happen from that second screenshot.

      1 user thanked author for this post.
    • #2010309

      Timeshift is a great program, and I use it often, but itโ€™s not meant as a full disaster recovery backup program, like if the hard drive dies or the PC is stolen. It does not, by default, back up your personal files, and mn- has already described some of the issues that can happen if files change during the backing up process.

      Could it be that Timeshift has evolved into a comprehensive backup program for home computer use?ย  That’s the idea I’m getting from this link: https://www.maketecheasier.com/backup-computer-timeshift-linux-mint/

      and it is included in my Mint Mate 19.2 distro.ย  Is there a reason not to go this route?ย  The description looks like a configurable full-system image to me…

    • #2010378

      but in this screen canโ€™t open โ€œbrowseโ€ function- able to highlight it using mouse and double click (no response from single click) but no response. Also, canโ€™t type in black text box, donโ€™t know what I would type there anyway.

      Pressing โ€œenterโ€ from here displays error message:3rd-s-shot
      So, Iโ€™m stuck. Could not make anything useful happen from that second screenshot.

      … Right. Veeam does not use mouse. It’s a pure text-mode application.

      If you’re running it in a terminal window, the terminal lets you use the mouse to highlight text for copying (say, to applications other than the terminal… like this text entry field here for example), but Veeam doesn’t do anything with it.

      (Text-mode applications with mouse integration do exist on Linux too. Veeam doesn’t seem to be one of them.)

      And @Ascaris seems to have forgotten to mention that you also need the Tab key. Standard behaviour for Tab, move between fields…

      Once you get the green cursor into the entry box you should be able to just type a folder path in there. Or use the keyboard to select Browse and have a keyboard-interactive folder selection.

      (Also you don’t stictly speaking have to do the ISO customization right now, but I would recommend it… just remember, it won’t actually do any good unless you also remember to make the bootable media from that customized ISO file before you need it.)

      4 users thanked author for this post.
    • #2010396

      (Also you donโ€™t stictly speaking have to do the ISO customization right now, but I would recommend itโ€ฆ just remember, it wonโ€™t actually do any good unless you also remember to make the bootable media from that customized ISO file before you need it.)

      At the risk of creating a small detour in the discussion, I have to say that if I were using Veeam and looking at that screen with the four choices (the middle screenshot in slowpoke47’s post above), I wouldn’t know how to proceed. Can’t tell how the four choices (two with X’s in them already) relate to each other, or how to decide which one (ones?) to select.


      1 user thanked author for this post.
      • #2010413

        The square brackets represent checkboxes.ย  The parenthesis represent radio buttons.ย  The button for custom media enables the bottom options, where you can download the base .iso to patch, or if you already have it on your PC, you can use the other option (Patch local ISO) and it will let you select a file.

        That’s if you want to create custom media.ย  Other backup programs, like Macrium Reflect, have that ability too, though I’ve never needed to use it on any of my systems.

        Dell XPS 13/9310, i5-1135G7/16GB, KDE Neon 6.2
        XPG Xenia 15, i7-9750H/32GB & GTX1660ti, Kubuntu 24.04
        Acer Swift Go 14, i5-1335U/16GB, Kubuntu 24.04 (and Win 11)

        2 users thanked author for this post.
    • #2010397

      At the risk of creating a small detour in the discussion, I have to say that if I were using Veeam and looking at that screen with the four choices (the middle screenshot in slowpoke47โ€™s post above), I wouldnโ€™t know how to proceed. Canโ€™t tell how the four choices (two with Xโ€™s in them already) relate to each other, or how to decide which one (ones?) to select.

      If you can’t tell, how do you think I feel?

      I’m starting to conclude that Veeam is too technically advanced for me.ย  Would appreciate some comments on the Timeshift app- see the link I posted earlier- seems to say that this program will back up everything in the system, including user files, if set to do so.

      If not Timeshift, then I need to find another backup program that is aimed at less advanced users.

      • #2010481

        On Linux, Veeam is (as far as I know) the easiest full (intended for disaster recovery and bare metal recovery) backup program to use that I know of, unfortunately.ย  I wish it wasn’t, but we don’t have much to choose from, as none of the usual makers of backup software (Macrium, Acronis, Paragon, Comodo, Aomei, EaseUS) have chosen to release anything for Linux desktop users.

        Someone could create a graphical front-end for Veeam, but I am not aware of any right now.ย  The Veeam interface is not bad, but it does look and act a little different than what a lot of people are used to.

        You can configure Timeshift to back up user data too, but it was not designed as a full disaster recovery program.ย  It’s meant to be the Linux equivalent of Windows System restore, which also does not back up personal files, and its author does not recommend it for full backups.

        It’s certainly better than nothing if you use it for full backups, but there are some caveats.

        First, there’s no such thing as restoring part of what was backed up in Timeshift.ย  It’s all or nothing, so if your Timeshift backup contains all of your personal data as well as the system data, you cannot use that backup to restore the system but leave your personal files alone (which is what Timeshift is intended to do).

        Second, there are the issues mn- mentioned when using rsync.ย  When you use Timeshift on a typical Linux PC (formatted in Ext4), it is using rsync behind the scenes.

        It can take a few hours to back up a drive with a lot of stuff on it, and if files change during that time, you won’t really know whether the backup will have the old file or the new file.ย  If the file was already backed up when the file changed, you get the old one in the backup; if the file that changed was not yet backed up when the file changed, you will get the new one.ย  That can at times cause problems if a given set of files are meant to work together.

        That is not usually a problem, but it has the possibility.

        Programs like Veeam (or Reflect on the Windows side) don’t have that problem, as they only see the file system in the manner it was when the backup starts.

        Timeshift doesn’t have any rescue media, though your Mint install/live USB/disc will work nicely, since the Mint live session has Timeshift already installed.

        I’d suggest that you keep going with Veeam for now and not let it intimidate you.ย  As problems pop up, we can help you knock themย  down, and before you know it, you’ll have learned how it works.ย  None of us start out knowing a lot about computers… you gain that knowledge one hurdle at a time.ย  I don’t have anything close to the technical knowledge that mn- has, but I know enough to know what to look for when I can’t figure out how to do something.

        The second and third screenshots are about modifying the rescue media, and I would just skip that for now by using TAB to move the selection cursor to the NEXT button and hit enter.

        I know the unfamiliar and awkward looking interface can look intimidating, but the way it works is pretty straightforward.ย  I’d suggest playing with the options and trying it out… use the arrow keys to move the selection, tab to move between fields (you’re right, mn-, I forgot to mention that), space to select an option, and enter to select forward and back after highlighting them.

        Don’t worry about creating a backup just yet… just start it, see how it works,watch how it behaves in response to your input, and soon it won’t be unfamiliar anymore.ย  Once you’ve seen how the interface works, you can use the options to create a backup.ย  It’s the same things you would be doing in Reflect, with the only difference being in how you tell the computer what you want it to do.

        You can also use a Macrium Reflect rescue USB drive or disc and perform the backup from there.ย  It will back up Linux Ext4 volumes just as easily as Windows NTFS volumes, but the computer will not be usable for other stuff while the backup is going on.ย  Veeam is fast and it works well, if you can just get past the unfamiliar interface, and Timeshift should work if configured for full backups, subject to the limitations described.ย  We’re stuck with a few not-perfect options in Linux on the desktop, but options they are!

        Dell XPS 13/9310, i5-1135G7/16GB, KDE Neon 6.2
        XPG Xenia 15, i7-9750H/32GB & GTX1660ti, Kubuntu 24.04
        Acer Swift Go 14, i5-1335U/16GB, Kubuntu 24.04 (and Win 11)

        • This reply was modified 5 years, 4 months ago by Ascaris.
        3 users thanked author for this post.
        • #2010522

          Once again, my thanks for your patient and encouraging replies.ย  I had mentally signed out of Veeam, but I’ll go over this thread again to see if I may be able to make some headway.ย  It doesn’t bother me too much that Veeam lacks a GUI, but operations that are second nature for you and the other professionals contributing here are often not at all familiar to me.

    • #2010425

      I have to say that if I were using Veeam and looking at that screen with the four choices (the middle screenshot in slowpoke47โ€™s post above), I wouldnโ€™t know how to proceed. Canโ€™t tell how the four choices (two with Xโ€™s in them already) relate to each other, or how to decide which one (ones?) to select.

      I though that was a pretty simple one.

      Well, the first one is “do” or “skip”. As in deselect it and you won’t get a patched iso now. IIRC it also hides the rest of this screen because those don’t apply if you’re not doing it.

      The second one is whether you want (U)EFI boot support for your new ISO. Without, it’ll be BIOS boot only.

      Then, the lower pair is easy. Those are mutually exclusive – either download a fresh base Veeam recovery iso, or use an already-downloaded one. Use the latter if you know you have a current base iso.

      If you canโ€™t tell, how do you think I feel?

      Iโ€™m starting to conclude that Veeam is too technically advanced for me.

      Well yeah, the target group Veeam actually generates revenue from tends to be rather more advanced…

      then I need to find another backup program that is aimed at less advanced users.

      The only reason why Timeshift doesn’t by default do user data is the amount of it, as plenty of files tend to change a lot so backups grow… local caches for mail and the like.

      There’s another tool that’s specifically for this – Dรฉjร  Dup. As the name suggests, it does deduplication so cuts down on the growth.

      Also it’s always good to have separation between “system” and “data”.

      3 users thanked author for this post.
    • #2010552

      @slowpoke47, this discussion prompted me to get done something that I’d been meaning to for a while: to try out a Linux program that I’d previously found, called Back In Time.

      I just finished performing a full system backup of my Kubuntu Linux machine using this program. I did not have to reboot, unmount disks, or go offline to enter a Live CD session. The application took a couple of hours (close to 70GB worth, including both OS files and user documents/pictures) to create the snapshot on my external USB HDD. When I inspected the contents of the snapshot, it looks like one can restore individual files and not just whole images. You can schedule backups and it sports a GUI with tooltips that pop up when you hover over an option whose name is not self-evident.ย  ๐Ÿ˜‰

      This is the closest I’ve seen in Linux to Macrium Reflect. As the Wikipedia article reports, there is no option to compress the image being made, and that’s the main drawback I’ve noticed. But storage nowadays is cheap, and I found the program to be relatively easy to use.

      If Veeam ends up not meeting your needs, I would suggest taking a look at Back in Time.


      • This reply was modified 5 years, 4 months ago by Cybertooth.
      2 users thanked author for this post.
      • #2010860

        That is the program Tony George, developer of Timeshift, recommends for full backups.ย  It is a front-end for rsync like Timeshift, though, and as such, is subject to the same rsync limitations as Timeshift. It’s a file-level backup, not an imaging backup, like Veeam or Reflect.

        I like Timeshift a lot, and I even made a donation to the author to encourage him.ย  I use it frequently, and it works quite well, but it’s only one of the tools in my chest.ย  For the full-scale, bare-metal restorations, I prefer the imaging backup programs, and the only one that I know of that runs natively in Linux (and does not cost a small fortune, like the $500 per year Acronis offering) is Veeam.

        Veeam can do compression, encryption, incremental images, and can back up directly to SMB or NFS network shares.ย  Veeam lets you mount backed up volumes (locally or on network shares) and use them like virtual hard drives, so file level browsing and recovery is possible, as it is with Timeshift and Back in Time.

        Where Veeam really shines is performance.ย  It matches or even beats my previous Windows speed champion, Aomei Backupper, for speed while writing encrypted backups.ย  I don’t know how fast Reflect is for this, as they only offer encryption for the paid version, and I’ve never used that.ย  I’ve read some speed comparisons for the most common Windows backup programs on the web, but they always had encryption off.ย  Enabling it ranged from little to no performance hit to doubling or worse the time it takes to create a backup, depending on the program.ย  Backupper was the one that remained the fastest with encryption on, and it’s great that the only imaging backup program I know of (that is free or reasonably priced) for Linux matches it.

        Looking over the logs here, I see that Veeam created an encrypted full image backup of my Swift’s root and home volumes (392 GB, containing 253 GB of data) in 56 minutes, over the LAN to my backup server (just a PC with a lot of hard drives in it, really).ย  The performance to a USB external drive is similar.ย  It’s really very good for a pretty slow PC by modern standards (it’s about the same as a Core 2 Duo laptop from ten years ago in terms of CPU performance).

        On the bad side, of course, is the lack of a graphical UI, and the lack of an ability to create more than one profile or backup scheme (which they call a ‘job’). Usually, I would define one to back up to a local (USB3) hard drive, and another to back up to my backup server over the LAN.ย  On Veeam, I have to change the backup location manually from remote share to local disk each time, though it fortunately remembers all of the details.ย  If you only ever back up to one place, that won’t matter a bit.

        As far as the UI… I guess it just takes getting used to.ย  Back in the day, when MS-DOS was the main OS for PCs, Veeam would have been considered quite user friendly and easy to use.ย  That’s when I got my start on PCs, and while I started with Windows in 1990, I used DOS preferentially until I was dragged, kicking and screaming, into the Windows-as-primary world. ย  Metaphorically, of course. As such, the command line and character-based user interfaces don’t faze me a bit, but I realize that it’s different for users who cut their teeth on GUIs.

        I’ve heard (well, read) a report that people rejected Linux because the GRUB menu made them think that something had gone wrong, merely because GRUB didn’t look polished enough.ย  It looked like the utilitarian error messages that appear sometimes, so it must have been an error too.ย  Even when it was explained that it’s ok, that’s just the startup menu that you see it for a couple of seconds a day,ย  and that the OS itself will not look like that, the person simply rejected it out of hand.

        I’m not suggesting anyone here is that quick to judge, but it does show how different the perception of things like a character user interface can be for an old-timer (in computer terms) and an, erm, less seasoned user.


        Dell XPS 13/9310, i5-1135G7/16GB, KDE Neon 6.2
        XPG Xenia 15, i7-9750H/32GB & GTX1660ti, Kubuntu 24.04
        Acer Swift Go 14, i5-1335U/16GB, Kubuntu 24.04 (and Win 11)

        3 users thanked author for this post.
        • #2010893

          Heh, we post-crossed again!

          And I was typing when I saw this notification pop up in my email!

          Thank you for another detailed post.ย  I don’t need encryption, which makes backups faster.ย  Also, my files are a small fraction of yours, can’t say exactly without rebooting into Windows to check.ย  Your case for Veeam is a strong one.ย  I fear lack of a GUI only due to concern of stumbling during the setup.ย  Once that is done, how do you interact with Veeam when a backup needs to happen?


    • #2010859

      I just finished performing a full system backup of my Kubuntu Linux machine using this program. I did not have to reboot, unmount disks, or go offline to enter a Live CD session. The application took a couple of hours (close to 70GB worth, including both OS files and user documents/pictures) to create the snapshot on my external USB HDD.

      The Macrium system images on Win7 take about half an hour or so, not sure how big the files are without rebooting into that OS, but they are only a fraction of yours.ย  Would the two-hour time period be the same for every backup?ย  And, if I decide to soldier on with Veeam, how long do those take?ย  The backup target is a dedicated 1tb disk, so I think the storage space issue is covered.

      • #2010870

        Heh, we post-crossed again!

        I wrote about the speed of Veeam in the post above.ย  I backed up a quarter of a terabyte in about an hour, and that was on my slow PC, with encryption enabled.ย  You don’t have to enable encryption, but if you do, it slows many backup programs down a lot.ย  As for Reflect, encryption is only available in the paid version, so I never tried it there.

        Dell XPS 13/9310, i5-1135G7/16GB, KDE Neon 6.2
        XPG Xenia 15, i7-9750H/32GB & GTX1660ti, Kubuntu 24.04
        Acer Swift Go 14, i5-1335U/16GB, Kubuntu 24.04 (and Win 11)

        • This reply was modified 5 years, 4 months ago by Ascaris.
        1 user thanked author for this post.
        • #2010945

          Also, Veeam does have adjustable compression. It goes from 0 to 4, defaults to 2 which is still heavily weighted towards speed. My 4T Seagate USB drive is sort of slow, so it was all blocked on the outbound write when I tried it… on 3 or 4 it might cause noticeable slowdown for other use during the backup run, on 2 (plus encryption) it wasn’t a bother.

          Not sure if the compression adjustment is in the menus, might have to set it on the command line.

          Would the two-hour time period be the same for every backup?

          Well naturally that depends on if it’s a full or incremental. Incrementals should be fairly quick as they only copy out what’s changed.

          2 users thanked author for this post.
          • #2010949

            Well naturally that depends on if itโ€™s a full or incremental. Incrementals should be fairly quick as they only copy out whatโ€™s changed.

            That’s true… the 56 minute time was for the full backup.ย  The most recent incremental took 24 minutes to back up the same two volumes (/ and /home).


            Dell XPS 13/9310, i5-1135G7/16GB, KDE Neon 6.2
            XPG Xenia 15, i7-9750H/32GB & GTX1660ti, Kubuntu 24.04
            Acer Swift Go 14, i5-1335U/16GB, Kubuntu 24.04 (and Win 11)

            1 user thanked author for this post.
      • #2010961

        @slowpoke47, looking deeper into the discussion and documentation, it looks like what Back In Time creates are not full backups each time, but “incremental” backups where files that haven’t changed since the last backup don’t get backed up a second time, but instead a link to the original file is created in the new backup.

        This is probably good news for you since it suggests that subsequent backups will be smaller and run faster than the first one; but it’s not such good news for me since I do prefer the simplicity of an all-encompassing backup file every time. (If my backup HDD is running out of space, how do I make room if the backups are incremental and every backup depends on previous ones?)

        And then I found this FAQ:

        What is the effect of “Modify for Full System Backup”? From the dialog that follows when clicking this button, I had assumed that some kind of file system dump including boot records would happen, but the backup looks just like any normal rsync backup?
        This is still work in progress. At the moment this only changes some default settings. In future it should support backing up boot sectors and partitioning, too.

        So what I saw billed as the kind of FULL system backup I’m looking for, is not–or at least, not yet. I may have to bite the CLI bullet and give Veeam a try. I do remember being put off the first time by the manual, which consists of hundreds of pages.


        • This reply was modified 5 years, 4 months ago by Cybertooth.
        • This reply was modified 5 years, 4 months ago by Cybertooth.
        2 users thanked author for this post.
        • #2011080

          So what I saw billed as the kind of FULL system backup Iโ€™m looking for, is notโ€“or at least, not yet. I may have to bite the CLI bullet and give Veeam a try. I do remember being put off the first time by the manual, which consists of hundreds of pages.

          The only part of the CLI (command line interface) you would be using in your use case (or mine) would be typing “sudo veeam” into the terminal, and you can get rid of that in a couple of minutes by creating a .desktop file (your desktop environment may have a handy editor to make it simple, as KDE does).

          The rest is menu-driven, in a wizard style.ย  It’s character based, but you don’t have to enter any commands; all you need is TAB, SPACE, ENTER, and of course the things you would need to type in any backup program, like the location you want to save the backup to over a network.

          If you can get over the unfamiliar and antiquated-seeming look of it, it’s not much different than a lot of wizard-type graphical UIs. It looks different and the manner that you navigate it will feel klunky and weird, but the logical organization should be familiar.

          The CLI in Veeam is there if you want it, but you are not required to use it.ย  People like mn- who were or are Unix or Linux admins may want to know about all of the nitty gritty stuff they can do from the command line, and are most comfortable using it in that way, but I’m more like you and Slowpoke in the sense that I am just an individual who wants to back stuff up on his personal computer(s) with as little fanfare as possible.ย  I would be happy if Veeam had a friendlier interface, but I don’t need it to.

          I may have been dragged into the world of the GUI, but I’m here now, and I have a strong preference for doing things that way rather than with the command line if I can.ย  I’m not afraid of or confused by the command line, but it’s just not my preference anymore.

          Everything I know about using PCs, from MS-DOS to Windows to Linux, is what I’ve learned by managing my own home computers.ย  I’ve just been doing that for more than 30 years, so I have accumulated some knowledge, but I’m not an IT pro or anything approaching it.

          I do remember being put off the first time by the manual, which consists of hundreds of pages.

          The what now?ย  <g>

          I never used the manual.ย  The basic UI of the program is sufficient to do what I need… now, it’s true that I didn’t know that there were four levels of compression available as mn- mentioned, and it’s also true that I don’t have any idea how to change them, as that would require the command line, but I can use it just fine without that, and I have.ย  I am sure you can too, and I think Slowpoke47 will manage too if he can overcome the intimidation factor.


          Dell XPS 13/9310, i5-1135G7/16GB, KDE Neon 6.2
          XPG Xenia 15, i7-9750H/32GB & GTX1660ti, Kubuntu 24.04
          Acer Swift Go 14, i5-1335U/16GB, Kubuntu 24.04 (and Win 11)

          3 users thanked author for this post.
    • #2010955

      Back in the day, when MS-DOS was the main OS for PCs, Veeam would have been considered quite user friendly and easy to use. Thatโ€™s when I got my start on PCs, and while I started with Windows in 1990, I used DOS preferentially until I was dragged, kicking and screaming, into the Windows-as-primary world. Metaphorically, of course. As such, the command line and character-based user interfaces donโ€™t faze me a bit, but I realize that itโ€™s different for users who cut their teeth on GUIs.

      I was an MS-DOS fan well into the 1990s. I used to boast (to people who would get it) that “I don’t do Windows!”ย  ๐Ÿ™‚

      Windows 3.1, the first version that I used, didn’t change my opinion. But the first time I tried Windows 98 with the Start menu and taskbar, I converted to the GUI and have never looked back. Nowadays the command line interface strikes me as clunky and clumsy, compared to GUIs where you can have multiple windows for the same program displaying different aspects of it; whereas in the CLI you can only have one bunch of stuff visible at a time.


      • #2011012

        compared to GUIs where you can have multiple windows for the same program displaying different aspects of it; whereas in the CLI you can only have one bunch of stuff visible at a time.

        ^A|^A^T^Ac … you were saying?

        (That’s the “screen” application’s command sequence to split current terminal window, switch to the new part and start a new shell in it. Also the detach/reattach thing can be very useful… especially in the old days with dialup…)

        Sort of like the DESQview user interface – not the backend because Unix/Linux/whatever does that part natively already.

        I may have to bite the CLI bullet and give Veeam a try. I do remember being put off the first time by the manual, which consists of hundreds of pages.

        Yeah, can’t really avoid that with applications designed to primarily fit into the high-end server market with all the special cases… the manual does have things like setting up specific extra handling for Oracle databases, which is some way into the “Enterprise / Datacenter” space already.

        and the lack of an ability to create more than one profile or backup scheme (which they call a โ€˜jobโ€™).

        Multiple jobs is one of the things you get with the paid version.

        I mean, the free tier is pretty much just an advertising channel with volunteer testers for Veeam.

        • #2011073

          Multiple jobs is one of the things you get with the paid version.

          Only the most expensive one, priced for multiple seats by the year.

          Dell XPS 13/9310, i5-1135G7/16GB, KDE Neon 6.2
          XPG Xenia 15, i7-9750H/32GB & GTX1660ti, Kubuntu 24.04
          Acer Swift Go 14, i5-1335U/16GB, Kubuntu 24.04 (and Win 11)

        • #2011081

          ^A|^A^T^Ac โ€ฆ you were saying?

          (Thatโ€™s the โ€œscreenโ€ applicationโ€™s command sequence to split current terminal window, switch to the new part and start a new shell in it. Also the detach/reattach thing can be very usefulโ€ฆ especially in the old days with dialupโ€ฆ)

          Sorry, I don’t know what the first line means. Would I be typing SHIFT+6 (to get the caret character) and then SHIFT+A for the upper-case “a”?

          • This reply was modified 5 years, 4 months ago by Cybertooth.
          • #2011206

            Sorry, I donโ€™t know what the first line means. Would I be typing SHIFT+6 (to get the caret character) and then SHIFT+A for the upper-case โ€œaโ€?

            Sorry, another long-standing convention. On many serial terminals, control characters in ‘show controls’ mode are denoted like that (and sometimes could even be copied and pasted), so…

            (You’d need to be running “screen” already.)

            ^A is Ctrl-A, command key for screen, then | for “split vertically”.
            Then Ctrl-A and Tab, to switch to the new buffer, and then Ctrl-A and c, to start a new shell session in it.

            Another convention is C-a etc. which is what the manual page uses. See “man screen” once you’ve installed it.

            1 user thanked author for this post.
    • #2011064

      Well… I was just working up to sticking my toe into the Veeam pond again, but the last few posts have made me think twice.ย  I’m sure Veeam is a great utility, but not at all sure I can win with it.

      Anyone know anything about this backup utility?

      https://www.reallinuxuser.com/luckybackup-is-a-powerful-backup-solution-for-linux/

      • #2011075

        Wellโ€ฆ I was just working up to sticking my toe into the Veeam pond again, but the last few posts have made me think twice. Iโ€™m sure Veeam is a great utility, but not at all sure I can win with it.

        Never know until you try.ย  There’s nothing to fear here… it’s just a program.

        Most people would never get to the point of installing Linux at all in the first place, or trying to install new hard drives, or anything like that.ย  People act like it’s some kind of rocket science to do those things, and when I tell them it’s not hard, they scoff and say, ” For YOU!”ย  But you’ve done them, and you know it’s not that bad.ย  You’d be one of the people they say “For YOU!” to.

        Anyone know anything about this backup utility? luckyBackup is a powerful backup solution for linux

        It’s another frontend for rsync, so all of the above stuff about the limitations therein applies.


        Dell XPS 13/9310, i5-1135G7/16GB, KDE Neon 6.2
        XPG Xenia 15, i7-9750H/32GB & GTX1660ti, Kubuntu 24.04
        Acer Swift Go 14, i5-1335U/16GB, Kubuntu 24.04 (and Win 11)

        1 user thanked author for this post.
    • #2011437

      Hmmm…

      I went to the Veeam website to explore this software. I was unable to download anything until I created an account. Not ideal, but tolerable.

      Finally got to the download page, where I was asked to accept the EULA, which I of course examined:

      Screenshot_20191126_122655
      Sure, this is the “free” version of Veeam for Linux, but it always gives me pause when I’m asked to give permission for anybody to come into my home and inspect my computer. The EULA doesn’t specify anywhere that this audit clause doesn’t apply to free licenses.

      For full-system, bare-metal backups, I may fall back on the Macrium Reflect live CD. A little inconvenient, having to exit the system in order to make a backup, but it sure beats giving inspectors free rein to snoop around my PC. (If as a practical matter they do not intend ever to use that right, then it needs to be left out of the EULA for the “free” version of the program.)


      3 users thanked author for this post.
      • #2011493

        Sure, this is the โ€œfreeโ€ version of Veeam for Linux, but it always gives me pause when Iโ€™m asked to give permission for anybody to come into my home and inspect my computer. The EULA doesnโ€™t specify anywhere that this audit clause doesnโ€™t apply to free licenses.

        Does Windows not have such a clause as well?ย  ‘Cause MS does send BSA goons to harass their prized business customers to shake them down for more, and nearly everyone here uses (or used) Windows.ย  Does Reflect not have that?

        I choose to interpret that bit about “normal business hours” as meaning the normal business hours of the site in question, and I am not a business, so there are none.ย  They can wait for me to be “open!”

        I went to their site yesterday to check to see if the rescue media image had been updated, and I saw that login screen too.ย  My password manager did not have anything for Veeam’s site, and when I tried the “reset password” thing, it did not know any of the email addresses I may have used, so I am guessing that bit is a new thing since the time I last visited.

        Dell XPS 13/9310, i5-1135G7/16GB, KDE Neon 6.2
        XPG Xenia 15, i7-9750H/32GB & GTX1660ti, Kubuntu 24.04
        Acer Swift Go 14, i5-1335U/16GB, Kubuntu 24.04 (and Win 11)

        2 users thanked author for this post.
        • #2011551

          Maybe Windows enterprise licenses are different? I don’t remember seeing an audit clause in the Windows EULA, though of course that doesn’t mean that there wasn’t any or that one hasn’t been inserted more recently. I do suppose my eyes would have lit up with flashing red TILT! signs if I’d noticed a clause like that. And if there is one, that’ll be all the more reason to exit Windows, pronto. (Pun intended.ย  ๐Ÿ™‚ )


          1 user thanked author for this post.
    • #2011452

      At this point I have (mostly) decided to go with LuckyBackup (despite the dopey name).ย  With everything else involved in learning a new system, and the plan to install a dual-boot with Mint in our other machine, I didn’t want to struggle with learning to operate Veeam through the command line as well.

      But youโ€™ve done them, and you know itโ€™s not that bad. Youโ€™d be one of the people they say โ€œFor YOU!โ€ to.

      Thanks for your vote of confidence, but several of my forays into cyberspace have been enabled by others, like yourself, who led me, often by the nose.

      1 user thanked author for this post.
      • #2011631

        Well, it’s certainly your prerogative to use whatever you want!ย  But just be aware, you don’t need to use the command line to operate Veeam, and keep in mind that any program that does sufficiently complex things is going to have some level of learning curve attached, including Back in Time or LuckyBackup.ย  Any backup program that is reasonably featured is going to ask you for the same information Veeam does, just in a slightly different way. The only real difference will be that the mouse works in the graphical programs and not in Veeam… the same keyboard controls that Veeam uses will work in a graphical program.

        If you change your mind, let me know! I’ll be happy to guide you.

        Dell XPS 13/9310, i5-1135G7/16GB, KDE Neon 6.2
        XPG Xenia 15, i7-9750H/32GB & GTX1660ti, Kubuntu 24.04
        Acer Swift Go 14, i5-1335U/16GB, Kubuntu 24.04 (and Win 11)

        1 user thanked author for this post.
    • #2011774

      @ Slowpoke47

      At this point I have (mostly) decided to go with LuckyBackup (despite the dopey name).

      With all due respect, I don’t think you know what choice you are making–and it has nothing to do with a *dopey name*!

      *LuckyBackup* is a file/folder backup solution–not a *system image backup* solution.

      Could it be that Timeshift has evolved into a comprehensive backup program for home computer use?

      *Timeshift* is a file/folder backup solution (this is a *special* backup–it allows you to go back in time to a previous backup that you have made (it’s like the Restore Point in Windows), but it is not restoring your Mint OS if the OS has failed)–not a *system image backup* solution.

      You need to understand the *difference*!

      Read these descriptions: for *LuckyBackup*, https://www.reallinuxuser.com/luckybackup-is-a-powerful-backup-solution-for-linux/ , and the actual User’s Manual, http://luckybackup.sourceforge.net/manual.html

      Nowhere will you see reference to *Rescue Media* that you can boot to to restore a broken Linux OS. To use the program, it must be installed and working on a healthy Linux OS.

      And for *TimeShift*, https://www.maketecheasier.com/backup-computer-timeshift-linux-mint/ and here, https://linuxhint.com/timeshift_linux_mint_19_usb/

      Again, nowhere will you find mention of *Rescue Media,* or the ability to restore in order to fix a broken Linux OS. Again, look at the description as to how to use the program–you have to have a functional Linux OS. If you can not boot to Linux, you can not use the program.

      If your Mint OS fails for some reason, what you would have to do is a *fresh* install of the Mint OS, overwriting your old OS, install the program, either *LuckyBackup* or *Timeshift*, and then restore the the backups. With *LuckyBackup*, you will get all your files restored, but none of your previous programs will be restored. They will all have to be installed one by one, and you will have to see if everything comes out okay. With *Timeshift*–to be honest, I don’t know what will happen because again all the prior programs that had been installed, will not be on the system, and I don’t know how that will integrate with the *Timeshift* backup.

      You’ve been through all of this just recently! When you made an error, and deleted critical files from your Win7 OS, you could no longer boot to Win7 to run Macrium Reflect to restore the *system image* file that you had made. We had to coach you through the process of creating the *Rescue Media*, and the process of restoring the system OS via the *Rescue Media* version of Macrium in order to get back to a functional Win7.

      A *system image file* restores the OS to it’s condition that it was in at the time of creating the image file. All programs will be restored in their condition at the time of the file creation. All files will be restored to the condition they were in on the date of the file creation. None of this happens with the above file/folder backup options, unless the Mint Linux OS is in perfect health, and functioning properly.

      Same thing applies to your Linux Mint OS. If a fatal error occurs to the OS, or to a program installation gone wrong, or …. whatever creates a problem that you can not easily recover from–you need a backup program that protects the OS with a *system image* file that you can restore.

      It’s obviously your choice–you can choose *LuckyBackup* or *Timeshift*, or whatever file/folder backup program you wish to use–but I want to make sure you understand that you will not have the protection that a *system image backup* offers like you had for your Win7 using Macrium Reflect. If you had been using a file/folder backup solution on your Win7 OS, you would still be unable to boot that system today!

      1 user thanked author for this post.
      • #2011930

        *Timeshift* is a file/folder backup solution (this is a *special* backupโ€“it allows you to go back in time to a previous backup that you have made (itโ€™s like the Restore Point in Windows), but it is not restoring your Mint OS if the OS has failed)โ€“not a *system image backup* solution.

        I’ve been spending time this week researching solutions for Linux that do provide a system image backup solution. To my disappointment, it turned out that Back in Time, which I’d suggested because of its friendly UI, is not one of them. So I resumed my search, with some urgency, for a Linux program that both (1) does a full system image, and (2) features a mouse-driven GUI.

        I may have found what I was looking for: Image for Linux, by TeraByte Unlimited. It creates the kind of backup that you could use to recover the whole system (partitions, OS, applications, data), and it uses the kind of “normal” GUI that we have all gotten used to since the 1990s. @slowpoke47 may find it appealing that you can set up incremental or differential backups if you wish, and you can also choose to encrypt the image. And while the backup took about two hours to create in Back In Time, in Image for Linux the backup and validation process was finished in less than fifteen minutes. (Caveat: I still need to get a replacement SSD to put into my Linux computer in order to perform the acid test of restoring the IfL image and booting into it.)

        Two possible drawbacks for anyone considering this program are that it’s not free ($29.95 for a one-time purchase; 30-day free trial) and that it needs to run from rescue media (a live CD or USB stick), rather than from the OS like Macrium Reflect or Acronis True Image. But to me at least, that’s a small inconvenience for the peace of mind of knowing that, in case of disaster, I can simply slide the restored image into my computer.


        1 user thanked author for this post.
        • #2012438

          Two possible drawbacks for anyone considering this program are that itโ€™s not free ($29.95 for a one-time purchase; 30-day free trial) and that it needs to run from rescue media (a live CD or USB stick), rather than from the OS like Macrium Reflect or Acronis True Image.

          That rules out any kind of automatic scheduling, and makes the system unusable while it is backing up.ย  If you want to go that way, you might as well use Macrium Reflect free from the USB drive and save the money.


          Dell XPS 13/9310, i5-1135G7/16GB, KDE Neon 6.2
          XPG Xenia 15, i7-9750H/32GB & GTX1660ti, Kubuntu 24.04
          Acer Swift Go 14, i5-1335U/16GB, Kubuntu 24.04 (and Win 11)

          1 user thanked author for this post.
          • #2012499

            Although, there’s a silly trick that I’ve done once, years ago, in an emergency of sorts…

            One can as root actually just read everything off the raw disk while the system is running.

            It’s mostly just one of the threat scenarios for information security, but in a very rare situation it might be useful even for legitimate uses. Just don’t plan on being able to do anything reliably with it.

          • #2012747

            Two possible drawbacks for anyone considering this program are that itโ€™s not free ($29.95 for a one-time purchase; 30-day free trial) and that it needs to run from rescue media (a live CD or USB stick), rather than from the OS like Macrium Reflect or Acronis True Image.

            That rules out any kind of automatic scheduling, and makes the system unusable while it is backing up.ย  If you want to go that way, you might as well use Macrium Reflect free from the USB drive and save the money.


            The thing is, the Macrium Reflect rescue CD seems to be unable to save to (or restore from) an external backup drive that’s been formatted in a Linux disk format such as Ext4. It can read my Kubuntu SSD and image it to an NTFS backup drive, but not to an Ext4 backup drive. When the rescue CD is loaded, it simply cannot see the Linux-formatted backup drive.

            For reasons that I can no longer remember, ๐Ÿ™‚ย  I ended up reformatting as Ext4 the external HDD that I’ve dedicated for the Kubuntu system. It’s been a while and so the details escape me, but it may have had something to do with one of the earlier backup programs (Systemback? Back In Time?) needing to back up Kubuntu to a drive that uses a specifically Linux format. So while Macrium Reflect can’t read this dedicated HDD, TeraByte Unlimited’s Image for Linux can.

            Incidentally, while IfL took about a quarter of an hour to image the Kubuntu SSD, Macrium Reflect took about 44 minutes, meaning there’s less downtime. I’ll have to think about whether that’s worth the price difference ($0 vs. $29.95).


    • #2011841

      Again, nowhere will you find mention of *Rescue Media,* or the ability to restore in order to fix a broken Linux OS. Again, look at the description as to how to use the programโ€“you have to have a functional Linux OS. If you can not boot to Linux, you can not use the program.

      Well, live-usb Linux is pretty common these days, and…

      If your Mint OS fails for some reason, what you would have to do is a *fresh* install of the Mint OS, overwriting your old OS, install the program, either *LuckyBackup* or *Timeshift*, and then restore the the backups.

      … I’m told it should be possible to boot a Mint installer live-usb, mount your real / if it’s still good enough for that and your backup device, and then run Timeshift from the live-usb to restore to the mounted /. (Mint 19 should include it on the installer media…)

      If your partitioning was lost or something, I expect you might have to run the first few stages of the installer to redo that.

      Might want to make it a persistent live-usb and install also your other backup/restore tool in the persistent part.

      As to what I do – I approximately never back up whole system in normal Linux usage. Normally, /etc, /home, /srv, (/data or equivalent if you have one,) /opt, /var/opt, /var/lib, /var/mail, /var/spool, /var/log and /usr/local is sufficient. The rest of the system should be easy to replace.

      1 user thanked author for this post.
    • #2011919

      @ mn-

      As to what I do โ€“ I approximately never back up whole system in normal Linux usage. Normally, /etc, /home, /srv, (/data or equivalent if you have one,) /opt, /var/opt, /var/lib, /var/mail, /var/spool, /var/log and /usr/local is sufficient. The rest of the system should be easy to replace.

      I do not use Linux or Mint–never have. So the above outline has little exact meaning. I get the general meaning–you back up certain necessary files, and then you can reinstall the basic Linux OS, restore those necessary files, and your good. Who needs an imaging program–right!?

      I realize the outline is meant to be a summary, but the number of intermediate steps, and how to apply them has to be lengthy, and complicated for any novice users.

      For @ Slowpoke47, we’re trying to help someone who is having trouble being told that there will be no mouse driven entries. He must learn to use keyboard strokes that have been assigned navigation functions, and different entry functions than what is familiar:

      Use the arrow keys to move the selection cursor, space to select an option, and enter to press the forward or back buttons.

      there is limited function of mouse and cursor- but in this screen canโ€™t open โ€œbrowseโ€ function- able to highlight it using mouse and double click (no response from single click) but no response. Also, canโ€™t type in black text box, donโ€™t know what I would type there anyway.

      f youโ€™re running it in a terminal window, the terminal lets you use the mouse to highlight text for copying (say, to applications other than the terminalโ€ฆ like this text entry field here for example), but Veeam doesnโ€™t do anything with it.

      (Text-mode applications with mouse integration do exist on Linux too. Veeam doesnโ€™t seem to be one of them.)

      And @ascaris seems to have forgotten to mention that you also need the Tab key. Standard behaviour for Tab, move between fieldsโ€ฆ

      I’m fairly sure that @ Slowpoke has not put these recommendations together in such a way that he can successfully interact with the Veeam setup program.

      @ Slowpoke–start up the Veeam setup program again. If you use the *TAB* key, can you go through the various entry boxes and highlight them? If you get to a point where the program will not respond to the *TAB* key, can you use the *ENTER* key to move onto the *next* area where the *TAB* key begins to function again until you reach the end of that section?

      Don’t worry about making any selections, or entering any text. Just see if those two keys allow you to move through the Setup program, skipping everything for the moment just to see what happens, and what’s next. If you reach a *hard stop* that will not let you go forward, select *OK*, and then *ESC* (Escape key) to see what happens then.

      Linux folks–help me on this one–do you use the *SPACE BAR* to put an *X* in a selected item if it’s highlighted–and press the *SPACE BAR* again to de-select the item if it’s the highlighted item?

      @ Slowpoke47–if the program is still stopping where you have shown in the screenshots above, try to *de-select* the two boxes where you have *X’s* (those are telling the program to do something–and you are required to enter information in that box at the bottom of the screenshot in order for the program to do your selected actions with the *X’s*)–does removing the *X’s* allow you to move onto the next section?

      1 user thanked author for this post.
      • #2012065

        I do not use Linux or Mintโ€“never have. So the above outline has little exact meaning. I get the general meaningโ€“you back up certain necessary files, and then you can reinstall the basic Linux OS, restore those necessary files, and your good. Who needs an imaging programโ€“right!?

        Well… actually, yes, pretty much so. And I can expect to be running fairly quickly on completely different hardware, even a very different base system distribution in many cases.

        Imaging is useful especially if you have several fairly similar devices, but not a proper backup strategy on its own.

        Also, on Linux and Unix a reinstall with most of the applications integrated with the operating system package management and then a data-only restore from backup is often actually faster than a full-system restore from backup. Did a bit of testing at a previous job and it really hasn’t changed that much since.

        Of course, this requires that the installation steps are properly documented and repeatable in the first place.

        I realize the outline is meant to be a summary, but the number of intermediate steps, and how to apply them has to be lengthy, and complicated for any novice users.

        And I’m sure novices will find it easier to do using a different method than mine.

        I’ve been doing this for decades and have some old-fashioned habits, after all.

        Current systems don’t even break if your backup solution clobbers preexisting hardlinks, unlike some of the old ones…

        Linux folksโ€“help me on this oneโ€“do you use the *SPACE BAR* to put an *X* in a selected item if itโ€™s highlightedโ€“and press the *SPACE BAR* again to de-select the item if itโ€™s the highlighted item?

        Yes, most of the time in the menu-driven applications. Not specific to Linux, I’m fairly sure a lot of applications did that back on MS-DOS already too, and if you’ve tried using Windows without a pointing device…

        2 users thanked author for this post.
    • #2012734

      Thanks to all who posted.ย  Once again, the Notify… check boxย  “unchecked” itself so I am just now back here.

      Been running around like a turkey with its legs cut off over the backup issue- tried Veeam more than once and hit a roadblock each time.ย  Same with LuckyBackup- error messages that I could not find out how to handle.

      There are lots of backup apps available and many opinions from knowledgeable users on how to proceed.ย  Many of the choices do not include an option for a system image- very important!ย  I’m not averse to a non-gui app per se, but my success in that context has been limited.

      Currently considering fwbackups fwbackups – A Feature-rich Backup Program for Linux for weekly backups and clonezilla How To Clone Your Linux Install With Clonezilla for monthly images.ย  Would be nice if the 1tb drive I plan to use can handle both, but don’t know how to partition it.


    • #2013118

      Today installed and tested the Veeam utility using the tutorial by Ascaris https://www.askwoody.com/forums/topic/a-step-by-step-illustrated-guide-to-using-veeam-to-back-up-to-an-external-hdd/ (a big thank-you for this) along with the Veeam user guide, and looks like I created a full backup, though I cannot as yet verify just what was backed up.ย  However, it looks promising.

    Viewing 35 reply threads
    Reply To: Setting up backup in Mint Mate 19.2 OS

    You can use BBCodes to format your content.
    Your account can't use all available BBCodes, they will be stripped before saving.

    Your information: