• It’s Been a Day—And a Lesson in Humility

    Home » Forums » AskWoody support » Windows » Windows 11 » Windows 11 version 24H2 » It’s Been a Day—And a Lesson in Humility

    Tags:

    Author
    Topic
    #2710327

    As I posted here, I’ve been at this upgrade for a while.  I actually first tried yesterday, with the failures I’ve mentioned, but it was late, and I decided to try today when I was fresh.  But what it amounted to was that I forgot my cardinal rules for troubleshooting.  “Start with the simple, and proceed to the complex” and “Is it plugged in?”

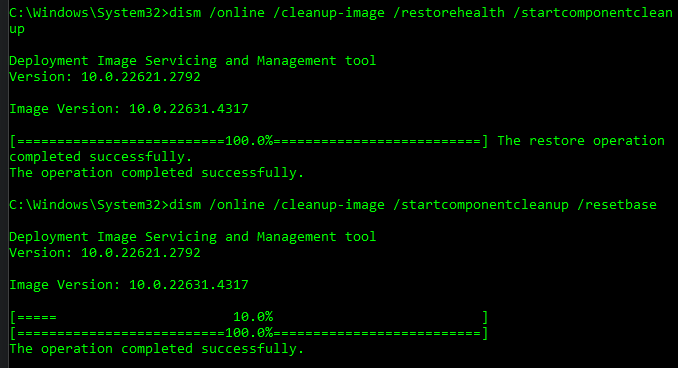
    The in-place upgrade just kept failing.  I ran ‘dism /online /cleanup-image /restorehealth’ followed by ‘dism /online /cleanup-image /startcomponentcleanup’ and both succeeded.  I ran ‘sfc /scannow’ which took a long time to run, but found no corrupted files.  But the in-place upgrade just wouldn’t go.

    After the failures, I decided to use the MCT to create a fresh USB, and tried that, but it still didn’t work.  So I decided to do a clean install of 24H2 on my B side (which I clean-installed with 23H2 back in July).  That got me into an installation loop.  It would get to 77%, reboot, and start all over again.  It did write a 16MB MSR partition and 14.1GB to the installation partition, but kept going through that loop.

    I pulled the USB on the last reboot, with the intention of booting into my BootIt UEFI USB and cleaning up my partitions while trying to figure out something else to try.  My BootIt UEFI USB failed to boot, black-screened with some error that read like it was coming from the UEFI settings.  I got even more curious, but in the wrong way.  That was a new USB for the latest version of BootIt UEFI (2.03 made available on September 14), and I thought perhaps the USB stick had errors.  I should have known better; TeraByte has never failed me, not even once.

    After another failed attempt at a clean install of 24H2, I wanted to see if the PC would boot at all.  It did, and offered me about 7 ‘ELEVEN’ (not ‘Windows’) boot entries in the boot menu.  I chose the top one, hit Enter, and it actually booted into the installation routine, completed the installation process, with a couple or three reboots along the way.  I’m assuming that’s what the 14.1GB of files were; the compressed installation files and executables.

    I decided to try again with a different USB port.  I used BootIt UEFI to clean things up, and started fresh from a port in the back of the PC.  After it successfully installed with no loops, I face-palmed for about 5 minutes, wondering how I could have ignored the obvious.  And that’s where the humility lesson came into play.  “Is it plugged in?”  “Start with the simple and proceed to the complex.”  I jumped into the middle and had been trying to dig myself out of that hole most of the day.

    My next venture will be to use BootIt UEFI to delete the B side, do a clean install of 23H2, then see if I can upgrade over the top.  If I can, that will verify that I tweaked the B side in the wrong direction, one way or another.  I’ll update the saga.

    Always create a fresh drive image before making system changes/Windows updates; you may need to start over!
    We all have our own reasons for doing the things that we do with our systems; we don't need anyone's approval, and we don't all have to do the same things.
    We were all once "Average Users".

    • This topic was modified 7 months ago by bbearren.
    • This topic was modified 7 months ago by bbearren.
    • This topic was modified 7 months ago by bbearren.
    • This topic was modified 7 months ago by bbearren.
    7 users thanked author for this post.
    Viewing 21 reply threads
    Author
    Replies
    • #2710450

      The law of unintended consequences also struck.  Back in A, in File Explorer all my partitions were overshadowed with an unlocked lock icon, and a big yellow triangle with an exclamation mark.  They were all (except C:) awaiting Bitlocker to be turned on.

      I’ve run ‘manage-bde -off C:’ in an elevated Powershell, and they are all in the process of decrypting as I’m typing this.  Installing 24H2 put Bitlocker on all of my partitions, since they are all visible whether I’m booted into the A side or B side.

      Also, I forgot to mention in the OP that the installation of 24H2 also put a 644MB Windows RE partition behind the OS partition.  I’ve already cleaned off the 16MB MSR partition and the Windows RE partition.

      My 1TB drives and large partitions are still decrypting.  Once that’s complete, I’ll run a clean install of 23H2, then see if I can run an in-place upgrade of 24H2.

      Always create a fresh drive image before making system changes/Windows updates; you may need to start over!
      We all have our own reasons for doing the things that we do with our systems; we don't need anyone's approval, and we don't all have to do the same things.
      We were all once "Average Users".

      1 user thanked author for this post.
      a
    • #2710489

      With all my partitions decrypted, I jumped through the hoops again, dodging the snares and tangles this time, and ran a clean install of 23H2 Pro on my B side.  I dodged the Microsoft account by selecting ‘Work or school’ and then ‘Signin options > Domain join instead’ and used a local account.  After naming my PC, it went into Update mode, and updated to OS Build 22631.4317.  That took a bit, and as soon as the boot into Windows and the OOBE rigamarole finished, I jumped into Services.msc to disable Bitlocker, Windows Backup and Windows Search.

      It only managed to encrypt the provisioning space on one of my 1TB NVMe drives, which I decrypted with Powershell.  I’m not going any farther with personalizations, just jump straight into the 24H2 upgrade, and see how that goes.

      Always create a fresh drive image before making system changes/Windows updates; you may need to start over!
      We all have our own reasons for doing the things that we do with our systems; we don't need anyone's approval, and we don't all have to do the same things.
      We were all once "Average Users".

      2 users thanked author for this post.
    • #2710597

      You have my sympathies! Hope you get it!!!

    • #2710892

      I’m still trying to get the Windows Update to work for upgrading a clean installation of 23H2 to 24H2.  I’m well practiced in jumping through the hoops required by Intel RST on my Asus Prime Z690M-Plus D4 motherboard.

      I can stop Bitlocker, clean away the detritus of a clean install, but the update to 24H2 still fails.  I’ve updated my UEFI/BIOS, set it to default values, but still no joy.  I can clean install 24H2 without issue (jumping through those hoops), but I would much prefer the update method to work.

      I spent a lot of yesterday on it, and intend to give it another go today.  One of the things I learned yesterday is that even though the update process tells me that all updates have been installed, after the failure, I checked Windows Update and there were five waiting.  So there’s that.  I’m creating a fresh USB for 23H2 and try that.

      Always create a fresh drive image before making system changes/Windows updates; you may need to start over!
      We all have our own reasons for doing the things that we do with our systems; we don't need anyone's approval, and we don't all have to do the same things.
      We were all once "Average Users".

      2 users thanked author for this post.
      • #2710896

        I can stop Bitlocker, clean away the detritus of a clean install, but the update to 24H2 still fails.

        Does that include removing the UWP Apps and Edge, changing the location of “things” to your multiple partitions, and doing your usual tweaks?

        • #2710964

          Does that include removing the UWP Apps and Edge, changing the location of “things” to your multiple partitions, and doing your usual tweaks?

          The only things I’ve done to the 23H2 clean install is to delete $Windows.BT folder, run Disk Cleanup and re-ordered the drive letters for my partitions.  I haven’t uninstalled any UWP Apps or Edge, or installed StartAllBack.

          I did another clean install this morning with a fresh USB drive.  Basic installation was 5:22, and the OOBE was 18:03.  I did the usual to get past the Microsoft account.  This time, after choosing the keyboard, I hit Shift+F10, entered ‘services.msc’ in the Command terminal, disabled Bitlocker and Windows Search, then exited and continued.

          I updated some MB specific drivers, and enabled the .NET framework in Windows Features, and re-trimmed all my partitions.  In the “Installing Windows 11” screen, it drops out at anywhere from 77% to 94% and falls back to my desktop with the “Installation failed” popup, no reboot.

          Always create a fresh drive image before making system changes/Windows updates; you may need to start over!
          We all have our own reasons for doing the things that we do with our systems; we don't need anyone's approval, and we don't all have to do the same things.
          We were all once "Average Users".

          1 user thanked author for this post.
          a
          • #2710969

            Assume you checked the video drivers (obvious). Do you have any WD drives? Alex reported today MS blocking some WD on firmware (did you see, if applicable).

            • #2711003

              Assume you checked the video drivers (obvious). Do you have any WD drives?

              No separate video card, latest Asus supplied Intel graphics driver.  No WD, all my drives are Samsung NVMe SSD and Samsung SATA SSD.

              Always create a fresh drive image before making system changes/Windows updates; you may need to start over!
              We all have our own reasons for doing the things that we do with our systems; we don't need anyone's approval, and we don't all have to do the same things.
              We were all once "Average Users".

              1 user thanked author for this post.
              a
          • #2711026

            I had this kind of behavior when I initially tried to install Windows 10 on the HP ProDesk 400 G5 SFF PC I bought used back in February. The install would fail at various percentages. I finally discovered that the problem was bad memory. 2 lower bits were bad over two short memory address ranges. A very tiny amount on only one of the 4GB cards. I recommend that you run the Windows Memory Diagnostic to rule that out in your case. Initially instead of replacing the card I used bcdedit to blacklist the memory and was able to install and run successfully. The seller later did send me a working replacement 8GB memory card.

            REM Enable memory blacklisting
            bcdedit /set {badmemory} badmemoryaccess no
            REM Specify what addresses to blacklist (Should all be on one line if shown otherwise)
            bcdedit /set {badmemory} badmemorylist 0x54930 0x54931 0x54932 0x54933 0x54934 0x54935 0x54936 0x54937 0x549A0 0x549A1 0x549A2 0x549A3 0x549A4 0x549A5 0x549A6 0x549A7
            REM and reboot.
            bcdedit /enum {badmemory}
            
            RAM Defects
            ———–
            identifier {badmemory}
            badmemoryaccess No
            badmemorylist 0x54930
            0x54931
            0x54932
            0x54933
            0x54934
            0x54935
            0x54936
            0x54937
            0x549a0
            0x549a1
            0x549a2
            0x549a3
            0x549a4
            0x549a5
            0x549a6
            0x549a7

            Later to remove it use:

            bcdedit /deletevalue {badmemory} badmemorylist
            
            “Windows removed bad memory regions from this PC.”

            Note in these two bad memory ranges, 0x8000 byte blocks, the lower 2 bits of 32 bit words were typically shown wrong:
            0x54930000-0x0x54938000
            0x549A0000-0x0x549A8000
            Memory cache must be off (slow) to repeatedly test a narrow range with offline tools.

            HP Compaq 6000 Pro SFF PC / Windows 10 Pro / 22H2
            Intel®Core™2 “Wolfdale” E8400 3.0 GHz / 8.00 GB

            HP ProDesk 400 G5 SFF PC / Windows 11 Pro / 23H2
            Intel®Core™ “Coffee Lake” i3-8100 3.6 GHz / 16.00 GB
            1 user thanked author for this post.
    • #2710968

      I am wondering why you don’t use the Rufus approach?

      • #2711010

        I am wondering why you don’t use the Rufus approach?

        I have, with the same results.

        Always create a fresh drive image before making system changes/Windows updates; you may need to start over!
        We all have our own reasons for doing the things that we do with our systems; we don't need anyone's approval, and we don't all have to do the same things.
        We were all once "Average Users".

        1 user thanked author for this post.
        a
    • #2710972

      The lack of MS driver signing is killer, as I found out with Win7 ESUb and are being checked during the transition from 23H2 to 24H2 that will likely issue halts/ stop to the transition process.
      This would be my train of thought given that firey hoops have been jumped through but, to no avail in your attempts.
      Might be worth a check, it may also be a driver 24H2 incompatibility that hasn’t been flagged up yet with hardware. Log files will likely give a clue..

      It’s been days and a Lesson….

      Windows - commercial by definition and now function...
      1 user thanked author for this post.
      • #2711054

        Log files will likely give a clue.

        Yes, I’ve been looking through logs and Event Viewer, nibbling away at this and that.  In an elevated Command Prompt I ran

        dism /online /cleanup-image /restorehealth
        dism /online /cleanup-image /startcomponentcleanup
        sfc /scannow

        Sfc found and corrected some corrupt files.  I also ran

        net stop wuauserv
        rd C:\Windows\SoftwareDistribution /s /q
        net start wuauserv

        And tried again.  Event Viewer showed that I had an issue in Component Services.  I found that two GUID’s were not properly connected with APPID in the registry and a suggestion to correct that for me, which I happily allowed.

        I got all the way to 94% this last time before it bailed on me.  I’m gonna let it go til tomorrow, then peruse some more logs and such, and see what other gremlins I can find.

        Always create a fresh drive image before making system changes/Windows updates; you may need to start over!
        We all have our own reasons for doing the things that we do with our systems; we don't need anyone's approval, and we don't all have to do the same things.
        We were all once "Average Users".

        1 user thanked author for this post.
        a
    • #2711039

      Stray thoughts…
      bad or multiple EFI partitions on the nvme.
      You would have had the best liklihood on upgrading the original used system since it would have had all the correct ASUS drivers…
      I keep wondering why it was so simple for me and so hard for you – only thought is you use encryption, and I am wondering if maybe you can no longer (get away with) shut it off with shift F10? Also I have an Nvidia card and don’t use Intel.
      Are you using your A and B on the same NVMe stick? I wonder if it’s keeping the EFI partition correctly.
      Could be bad memory but I would bet no , nor, bad NVMe’s since u’r using Sammys

      Screenshot-2024-10-17-220127

      1 user thanked author for this post.
      • #2711057

        bad or multiple EFI partitions on the nvme.

        No, only one, and I dual boot so the BCDStore is working just fine.

        You would have had the best liklihood on upgrading the original used system since it would have had all the correct ASUS drivers…

        I’ve already tried that; I restored a drive image of the original, and got a few failures with that before I went back to the clean install.

        I keep wondering why it was so simple for me and so hard for you – only thought is you use encryption

        No, I have Bitlocker disabled, Control Panel\System and Security\BitLocker Drive Encryption shows that Bitlocker is Off on all drives.

        Are you using your A and B on the same NVMe stick?

        No, they’re on different NVMe drives.  And again, EFI is fine.

        Also watch the NIC lights flashing or not as you get near that 70% point (NIC drivers?)

        NIC drivers are current, Intel drivers via Asus.

        Always create a fresh drive image before making system changes/Windows updates; you may need to start over!
        We all have our own reasons for doing the things that we do with our systems; we don't need anyone's approval, and we don't all have to do the same things.
        We were all once "Average Users".

        1 user thanked author for this post.
        a
    • #2711046

      Also watch the NIC lights flashing or not as you get near that 70% point (NIC drivers?)

      1 user thanked author for this post.
    • #2711427

      Aha! Would the hardware involved be an ASUS Prime Z690M-Plus D4?
      If so, it looks like your hardware may be a collateral block,
      as MSFT have put a block on ASUS motherboards/devices for W11 24H2.

      As to which models are involved is, as ever, transparent /s

      Ref: https://learn.microsoft.com/en-us/windows/release-health/status-windows-11-24H2#3424msgdesc

      Windows - commercial by definition and now function...
      • #2711465

        Would the hardware involved be an ASUS Prime Z690M-Plus D4?

        Computer Specs.  It’s in my signature.

        Always create a fresh drive image before making system changes/Windows updates; you may need to start over!
        We all have our own reasons for doing the things that we do with our systems; we don't need anyone's approval, and we don't all have to do the same things.
        We were all once "Average Users".

        1 user thanked author for this post.
        a
        • #2711521

          Yeah I found that right after – sorry – DUH!!!

    • #2711430

      See @Alex5723 post here, too.

    • #2711432

      Aha! Would the hardware involved be an ASUS Prime Z690M-Plus D4?
      If so, it looks like your hardware may be a collateral block,
      as MSFT have put a block on ASUS motherboards/devices for W11 24H2.

      As to which models are involved is, as ever, transparent /s

      Ref: https://learn.microsoft.com/en-us/windows/release-health/status-windows-11-24H2#3424msgdesc

      Those are laptops. (X415, X515)
      I am running a Z790 which is very similar and had zero problems.

      1 user thanked author for this post.
      PL1
    • #2711442

      Can I ask what cpu?
      Oh I see I5 12600K should be okay.
      Try vid driver from Intel?

      • #2711466

        Try vid driver from Intel?

        The latest: Driver version 32.0.101.5872 8/19/2024.

        Always create a fresh drive image before making system changes/Windows updates; you may need to start over!
        We all have our own reasons for doing the things that we do with our systems; we don't need anyone's approval, and we don't all have to do the same things.
        We were all once "Average Users".

        1 user thanked author for this post.
        a
        • #2711522

          Yes, I should have known you better than to ask that! Sorry.

    • #2711443

      21 partitions spread across – unplug(/unmount at start, but probably remove to outsmart restarts) any unneeded stick for the install – I have had to do that on some installs.

      • #2711467

        21 partitions spread across – unplug(/unmount at start, but probably remove to outsmart restarts) any unneeded stick for the install – I have had to do that on some installs.

        I just unplug the externals.  My EFI partition is on a different NVMe.  And there are reasons for those partitions and what is located where.  I’ve been working on it today, chipping away slowly but surely.

        It’s down to permissions, now.  I can do a clean install of 24H2.  I’m wanting to get the in-place upgrade over 23H2 working; that’s my goal.  It’s an interesting puzzle.  I did another clean install of 23H2 this morning, this time using the “Load drivers” and installing Intel RST, rather that disabling it in UEFI to see all the drives.

        Always create a fresh drive image before making system changes/Windows updates; you may need to start over!
        We all have our own reasons for doing the things that we do with our systems; we don't need anyone's approval, and we don't all have to do the same things.
        We were all once "Average Users".

        1 user thanked author for this post.
        a
    • #2711448

      ASUS Prime Z790-V WIFI, I9-12900k, Gigabyte 3060Ti, UEFI/GPT, 32GB

      I realize this is an off-topic question on Bbearren’s original topic.

      Nice specs.   2 questions:

      What case are you using?

      Did you build it from scratch or is it a pre-built?

      Desktop mobo Asus TUF X299 Mark 1, CPU: Intel Core i7-7820X Skylake-X 8-Core 3.6 GHz, RAM: 32GB, GPU: Nvidia GTX 1050 Ti 4GB. Display: Four 27" 1080p screens 2 over 2 quad.
      • #2711451

        I realize this is an off-topic question on Bbearren’s original topic.

        Uh, @TechTango , you might be better off using the PM (Private Messages) app located here on AskWoody to ask the question. After all, your questions are directed only towards @krism , and using Private Messages would avoid the potential of having one of the moderators remove the post for being off topic.  😉

        1 user thanked author for this post.
    • #2711453

      I realize this is an off-topic question on Bbearren’s original topic.

      Uh, @TechTango , you might be better off using the PM (Private Messages) app located here on AskWoody to ask the question. After all, your questions are directed only towards @krism , and using Private Messages would avoid the potential of having one of the moderators remove the post for being off topic.  😉


      @Bob99
      I no longer accept PMs anywhere. People don’t have boundaries.


      @TechTango
      I build my own boxes. parts: I updated my sig below.
      From experience I avoid liquid coolers and off brand PSUs.

      2 users thanked author for this post.
    • #2711524

      I just unplug the externals.

      Yeah, it was the externals that got me, not the internal stuff.

    • #2711807

      It’s been a week.  Despite all my efforts, the update process kept producing the same errors every time.  Apparently there is a blocking mechanism for updating to 24H2 on my motherboard.

      So I did a clean installation of 24H2.  There’s a clod in the butter churn on that, too.  It does a reboot loop back to selecting a language.  However, the installation files and executables are already loaded, so the simple trick is to remove the USB drive, and boot directly into the Windows 11 installation, where it proceeds to install 24H2.

      Interestingly, at the final reboot, instead of having to set up a user account, it booted directly into the local account in the Administrators group I had already set up in my many in-place upgrade attempts.  Evidently, that account was left somewhere in the EFI partition, either in bootmgr or some such folder.  Maybe I’ll look into that another time.

      After the OOBE, I ran

      dism /online /cleanup-image /restorehealth
      dism /online /cleanup-image /startcomponentcleanup /resetbase
      sfc /scannow

      Then I ran Windows Update and there were 5.  After the updates were installed and the PC restarted, I ran

      dism /online /cleanup-image /restorehealth
      dism /online /cleanup-image /startcomponentcleanup
      sfc /scannow

      Sfc found and repaired corrupted files both times.

      At any rate, I’m now running fully updated Windows 11 Pro Version 24H2 (OS Build 26100.2033).

      Always create a fresh drive image before making system changes/Windows updates; you may need to start over!
      We all have our own reasons for doing the things that we do with our systems; we don't need anyone's approval, and we don't all have to do the same things.
      We were all once "Average Users".

      4 users thanked author for this post.
      • #2711822

        Very scary to think that your ASUS mobo caused all that – especially since mine is only 1 notch newer…

    • #2711859

      dism /online /cleanup-image /restorehealth
      dism /online /cleanup-image /startcomponentcleanup
      sfc /scannow

      Question: (I ran sfc /scannow out of curiosity and it found and corrected a couple files, twice – then I realized I should have run the 2 dism’s first :
      can I run them with WuMgr using update or do I have to put update back to windows control?

      • #2711865

        can I run them with WuMgr using update or do I have to put update back to windows control?

        The dism commands work directly on the Windows image stored in your PC.  Dism can go online to Windows Update whether WuMgr is in use or not.  Dism only cleans up/restores the image on your machine, it doesn’t update it.

        Sfc /scannow uses that image to repair/replace corrupted files in the System folder.  That’s why I always run the dism cleanup commands before I run sfc /scannow.  I found that out some years back when sfc could not repair the corrupted files it found.  After running the dism cleanup commands, sfc could do its work and repair the corrupted files.

        Always create a fresh drive image before making system changes/Windows updates; you may need to start over!
        We all have our own reasons for doing the things that we do with our systems; we don't need anyone's approval, and we don't all have to do the same things.
        We were all once "Average Users".

        5 users thanked author for this post.
        • #2711973

          The dism commands work directly on the Windows image stored in your PC.

          Just to clarify, dism can also be used on a mounted ISO Windows image, such as “install.wim”, “install.esd” or “winre.wim”.  For example, refer to WinRE.

          It is the “Deployment Image Servicing and Management” tool.

          Always create a fresh drive image before making system changes/Windows updates; you may need to start over!
          We all have our own reasons for doing the things that we do with our systems; we don't need anyone's approval, and we don't all have to do the same things.
          We were all once "Average Users".

    • #2711860

      dism /online /cleanup-image /restorehealth
      dism /online /cleanup-image /startcomponentcleanup


      @bbearren
      , do you have to run the commands above as 2 separate commands?

      I’ve been running them as:

      dism /online /cleanup-image /restorehealth /startcomponentcleanup
      

      To date I have not received any error messages running them as a single command. Am I missing something?

      May the Forces of good computing be with you!

      RG

      PowerShell & VBA Rule!
      Computer Specs

      1 user thanked author for this post.
      • #2711863

        To date I have not received any error messages running them as a single command. Am I missing something?

        I left off a switch in the /startcomponentcleanup command; it’s /resetbase.

        It’s my understanding that /startcomponentcleanup /resetbase is aimed specifically at the C:\Windows\WinSxS folder.  Run singly, in 23H2 it runs in two separate progress lines; the first goes to 10%, and the second goes all the way to 100%.  In 24H2, there’s a single progress line.

        I ran them as you do just now, and only get a single progress line, and a report that the restore operation completed successfully.

        DISM-Commands

        I’ve always run them singly.

        Always create a fresh drive image before making system changes/Windows updates; you may need to start over!
        We all have our own reasons for doing the things that we do with our systems; we don't need anyone's approval, and we don't all have to do the same things.
        We were all once "Average Users".

        1 user thanked author for this post.
      • #2711941

        To date I have not received any error messages running them as a single command. Am I missing something?

        If you run the DISM help option for cleanup-image (dism /online /cleanup-image /?) the results don’t show an example of combining both /restorehealth /startcomponentcleanup as one command.

        They show up as…

        /Cleanup-Image {/CheckHealth | /ScanHealth | /RestoreHealth}

        and…

        /Cleanup-Image /StartComponentCleanup [/ResetBase [/Defer]]

        Which would seem to indicate they have to be run as separate commands.

        Also, the results of running just /restorehealth and the combined /restorehealth /startcomponentcleanup commands are exactly the same!

        DISM-Results

        If both commands where being run, I “assume” there’d be two different The operation completed successfully lines, one for each command, but there’s only one.

        Finally, I checked my DISM.log and, other that different PID’s & TID’s between the two versions, there was absolutely no difference in the logged results between them; which would also seem to indicate only the /restorehealth part of the command was completed.

        Of course the real test would be, after an update has been successfully installed…

          Run dism /online /cleanup-Image /analyzeComponentStore and note the size of the Component Store.

          Run the combined /restorehealth /startcomponentcleanup commands.

          Then run /analyzeComponentStore again to see if the /startcomponentcleanup part of the combined command actually reduced the size of the Component Store?

        3 users thanked author for this post.
        • #2712098

          Thanks!

          I found this interesting tidbit in the help file…

           WARNING!  The installed Windows Updates cannot be uninstalled after the
            /StartComponentCleanup with /ResetBase operation is completed.
          

          May the Forces of good computing be with you!

          RG

          PowerShell & VBA Rule!
          Computer Specs

          • #2712119

            I found this interesting tidbit in the help file… WARNING! The installed Windows Updates cannot be uninstalled after the /StartComponentCleanup with /ResetBase operation is completed.

            True, except for a Hardened Windows user. I used a stopwatch app on my phone to time IFW creating a drive image of my fresh installation of 24H2 at 23.8GB. IFW is one of the first installations, so I can keep stepping stones on my way to getting Windows set up my way. It took 1:54.64 from double-clicking the shortcut, clicking Yes on the UAC, until the image and byte-for-byte verification was completed successfully. There was a fairly short wait for PHYLock to take over the drive.

            I then timed running dism /online /cleanup-image /startcomponentcleanup /resetbase from right-clicking the shortcut, clicking Yes on the UAC and typing in the command. It took 1:55.85.

            In my experience, it is quite safe to ignore that warning, as I have been doing for a couple or so years.

            Always create a fresh drive image before making system changes/Windows updates; you may need to start over!
            We all have our own reasons for doing the things that we do with our systems; we don't need anyone's approval, and we don't all have to do the same things.
            We were all once "Average Users".

        • #2712895

          do you have to run the commands above as 2 separate commands?

          Ok, after trying to determine why Open-Shell on my AUS desktop causes problems with KB5044273 (see post# 2712711 and it’s replies), I’ve got the answer as to whether /RestoreHealth /StartComponentCleanup can be run together.

          Size of the Component Store after KB5044273 was successfully installed.

          DISM-Before

          Size of the Component Store after running /RestoreHealth /StartComponentCleanup together.

          DISM-After1

            Notice how the size “increased” by +0.41 GB because the Cache and Temporary data size increased significantly!

            Unfortunately, I couldn’t find any way to actually delete the Cache and Temporary data??

          Size of the Component Store after running just /StartComponentCleanup

          DISM-After2

            • Huge reduction in the size of the Component Store and the Cache and Temporary data were completely deleted!

          This shows that running /RestoreHealth /StartComponentCleanup together only applies the /RestoreHealth part of the two commands.

          2 users thanked author for this post.
    • #2711939

      According to Clean Up the WinSxS Folder | Microsoft Learn the resetbase parameter does the following:

      “Using the /ResetBase parameter together with the /StartComponentCleanup parameter of DISM.exe on a running version of Windows 10 or later removes all superseded versions of every component in the component store.”

      --Joe

      2 users thanked author for this post.
      • #2711970

        “Using the /ResetBase parameter together with the /StartComponentCleanup parameter of DISM.exe on a running version of Windows 10 or later removes all superseded versions of every component in the component store.”

        I recall reading questions/answers on some forum site about the growth of the SxS folder, and that Microsoft article was one of the answers.

        I typically don’t run that command except after a cumulative update or installation of a software suite of some kind, an in-place upgrade, or a clean install.  I routinely run /restorehealth and sfc /scannow from time to time.

        Always create a fresh drive image before making system changes/Windows updates; you may need to start over!
        We all have our own reasons for doing the things that we do with our systems; we don't need anyone's approval, and we don't all have to do the same things.
        We were all once "Average Users".

        1 user thanked author for this post.
        a
    • #2712008

      I routinely run /restorehealth and sfc /scannow from time to time.

      As a beginner to dism I have to ask does that mean you “routinely” do not run
      dism /online /cleanup-image /startcomponentcleanup /resetbase
      ?

      Thanks!

      • #2712014

        As a beginner to dism I have to ask does that mean you “routinely” do not run dism /online /cleanup-image /startcomponentcleanup /resetbase ?

        No, not routinely. 

        I typically don’t run that command except after a cumulative update or installation of a software suite of some kind, an in-place upgrade, or a clean install.

        The Windows\WinSxS folder came into being to combat “dll hell” in earlier versions of Windows, when installing programs sometimes meant that the program’s installation routine would modify a Windows .dll file to suit that program’s needs.

        From time to time, that sort of modification of dll files would break something else—another program using that same dll, or sometimes parts of Windows itself.  The WinSxS folder allows program installations to install their particular mods to a dll file into a subfolder in WinSxS, and then call up their own dll from their own WinSxS subfolder.  There may be other files in such subfolders, but “dll hell” sorta became a thing of the past.

        So, unless I’ve installed (or uninstalled) a program or program suite, or received a Windows cumulative update, I don’t run the /startcomponentcleanup /reset base.  Windows is supposed to take care of that during a cumulative update, but I’m a belt & suspenders type, so I’ll run it then, too.

        Always create a fresh drive image before making system changes/Windows updates; you may need to start over!
        We all have our own reasons for doing the things that we do with our systems; we don't need anyone's approval, and we don't all have to do the same things.
        We were all once "Average Users".

        2 users thanked author for this post.
        • #2712019

          so basically once a month. Thanks! Very helpful!!!

    • #2712021

      Intrestingly I did not get that second 10% line…

      Windows PowerShell
      Copyright (C) Microsoft Corporation. All rights reserved.

      Install the latest PowerShell for new features and improvements! https://aka.ms/PSWindows

      PS C:\Users\kris> dism /online /cleanup-image /restorehealth

      Deployment Image Servicing and Management tool
      Version: 10.0.26100.1150

      Image Version: 10.0.26100.2033

      [==========================100.0%==========================] The restore operation completed successfully.
      The operation completed successfully.
      PS C:\Users\kris> dism /online /cleanup-image /startcomponentcleanup /resetbase

      Deployment Image Servicing and Management tool
      Version: 10.0.26100.1150

      Image Version: 10.0.26100.2033

      [==========================100.0%==========================]
      The operation completed successfully.
      PS C:\Users\kris> sfc /scannow

      Beginning system scan. This process will take some time.

      Beginning verification phase of system scan.
      Verification 100% complete.

      Windows Resource Protection found corrupt files and successfully repaired them.
      For online repairs, details are included in the CBS log file located at
      windir\Logs\CBS\CBS.log. For example C:\Windows\Logs\CBS\CBS.log. For offline
      repairs, details are included in the log file provided by the /OFFLOGFILE flag.
      PS C:\Users\kris> dism /online /cleanup-image /startcomponentcleanup /resetbase

      • #2712084

        Intrestingly I did not get that second 10% line…

        Run singly, in 23H2 it runs in two separate progress lines; the first goes to 10%, and the second goes all the way to 100%. In 24H2, there’s a single progress line.

        Always create a fresh drive image before making system changes/Windows updates; you may need to start over!
        We all have our own reasons for doing the things that we do with our systems; we don't need anyone's approval, and we don't all have to do the same things.
        We were all once "Average Users".

        1 user thanked author for this post.
        a
    Viewing 21 reply threads
    Reply To: It’s Been a Day—And a Lesson in Humility

    You can use BBCodes to format your content.
    Your account can't use all available BBCodes, they will be stripped before saving.

    Your information: