
Well I finally got around to doing my new from the grownd up computer build, it’s been four years since the last time I built.
I had a serious itch to build with the latest tech in high speed drives, and that would be a solid state drive that boots & operates from a PCIE slot on the mainboard.
I can tell you right now that this is a performance winner in every sense of the word.
This is the sort of drive that will render curtailing applications that start up with the operating system a thing of the past.
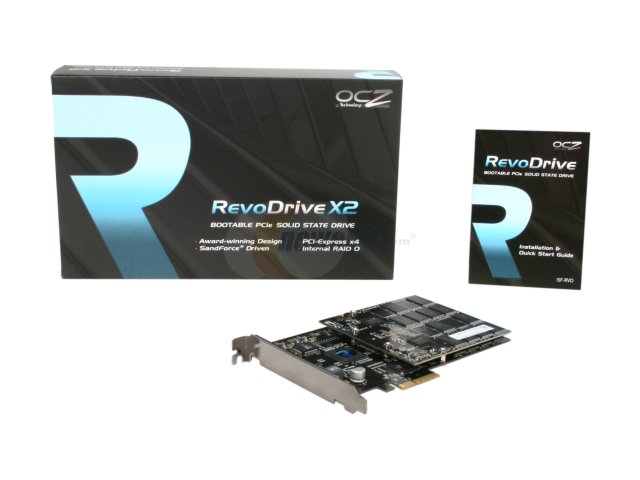
OCZ RevoDrive X2 160GB PCI-Express x4 MLC Internal Solid State Drive (SSD)
OCZ Motherboard Compatibility Shortlist
28474-OCZ-RevoDrive-X2-OCZSSDPX-PCI-Express-x4-MLC-Internal-Solid-State-Drive
SPECS:
Brand OCZ
Series RevoDrive X2
Model OCZSSDPX-1RVDX0160
Device Type Internal Solid State Drive (SSD)
Used For Consumer Physical Form Factor PCI-E
Capacity 160GB
Memory Components MLC
Interface PCI-Express x4 Performance
Sustained Sequential Read up to 740MB/s
Sustained Sequential Write up to 690MB/s
MTBF 2,000,000 hours Features
Features Sustained Write: upto 550 MB/s
4KB Random Write: 100,000 IOPS
Seek Time: 0.1 ms
Onboard RAID 0
ECC:27 bytes of redundancy per 512bytes data. Up to twelve 9-bit symbols correctable
PCI-Express: Fully compliant with the PCIe ElectromechanicalSpecification Rev. 1.1, and with thePCI-Express Base Specification Rev. 1.1 Environmental
Power Consumption (Idle) 4.3W
Power Consumption (Active) 8.3W
Max Shock Resistance 1500G Manufacturer Warranty
Parts 3 years limited
Labor 3 years limited
The drive is currently priced in the Four hundred dollar range, a bit expensive, but as time passes I’m sure these things will start to come down in price somewhat. For me I think it is worth it.
The drive comes preconfigured with a RAID 0 setup on a chip built onto it’s board. This sort of configuration helps push those read/write speed specs into the 600-700 MB/s as advertised in the specifications list. That is the realy nice part about this drive, a RAID set up where you need not do anything to set up other than download the driver, as Windows 7 does not have them.
BIOS Settings
Individual BIOS setting will vary between board makers, with mine, I had to have this configured for AHCI Mode, set all other SATA ports to IDE, and disable S3 sleep. (set to S1)
Getting this set up in a system where I had all my SATA port populated, including SSD’s on the SATA 3.0 ports & regular HDD’s on the SATA 2.0 ports, was a bit of trial and error frustration. I would, in retrospect, just install this drive only, get it set up with an operating system installed and have it running and booting stable before installing other drives on any other SATA ports.
Install & Set Up
Installation and set-up wasn’t too bad, that is, if you have taken the time to research what that would entail. Not all motherboards will operate this drive.
It’s up to you to do the legwork involved in finding this out.
The Motherboard I decided on required that the drive be placed on the second PCIEx16 slot. I have a brand new NVIDIA GTX 580 sitting in the first X16 slot, so the OCZ drive sits within millimeters of it. The GPU card has a very decent thermal solution and rarely gets above 40 C at stock settings under normal loads.
Installing the operating system requires the downloading of drivers directly from the OCZ website, no CD/DVD in the retail package, and as many of you already know, it is better to have all the latest drivers for a new build, downloaded directly from the product’s website. There is a very good chance that when you install something from a packaged DVD driver disc, they are already outdated. Brand new hardware demands the latest drivers, this is certainly true with regard to motherboard and BIOS. Alway ensure that your BIOS if up to date.
At some point after boot from the Windows 7 64 bit installation disc you are asked to supply the drivers. Many suggest converting the operating system set up to a bootable USB device and placing the needed drivers in there, and that’s a decent way to speed up and ensure a trouble free install. But all I needed
to do was place the needed drivers on any USB stick, insert it into a USB drive slot on the computer, and refresh “browse”. The installation then proceeded without a hitch. Some recommend disabling the PCIE link state power management in the advanced section under PCI Express, when you finally get into the os upon first boot, but I have not done this and I don’t see any issues as a result,…thus far that is. I’ve had this up and running for a little over 24 hrs now.
OLYMPUS DIGITAL CAMERA
The card is seated just under the GPU card
Questions & comment are welcome
Thanks for veiwing
CLiNT.


