• Auto Save Windows Screenshots

    Home » Forums » AskWoody support » Windows » Windows 10 » Windows 10-other » Auto Save Windows Screenshots

    Author
    Topic
    #2752299

    There have been a lot of posts and articles about taking screenshots in Windows.  I’m not sure if this method was covered and pardon me if it was, but it is a handy tip to know.

    I like this method for those occasions I need a screenshot but don’t want to stop what I’m doing to take and save a screenshot such as an unexpected error message that I need to deal with.  No problem, press two keys and continue dealing with the error, and you have an exact copy of that error message for future use.  That is, if you remember to press those two keys.

    Auto Save Windows Screenshots

    What

    Instructions how to take a screenshot so the screenshot is automatically saved to file without any other action by the user.

    Why

    Screenshots taken with Windows Snip and Sketch tool or other apps require additional steps and another app to save the screenshot which in some situations is an interruption and hassle to the task you are doing.  It would be much easier to press two keys, take the screenshot, Windows auto saves it, you continue your task, and later you can review and use the saved screenshot.  Here’s how.

    Note:    This applies to Windows 10 and I am told will work for Windows 11, but I have not tested it on Windows 11.

    How

    • To take an auto save screenshot press the WinKey and the Print Screen keys at the same time (WinKey + Print Screen). On some keyboards the Print Screen key is labeled Prt Scr or PS.
    • The screen will dim for a second and no other noticeable action occurs.
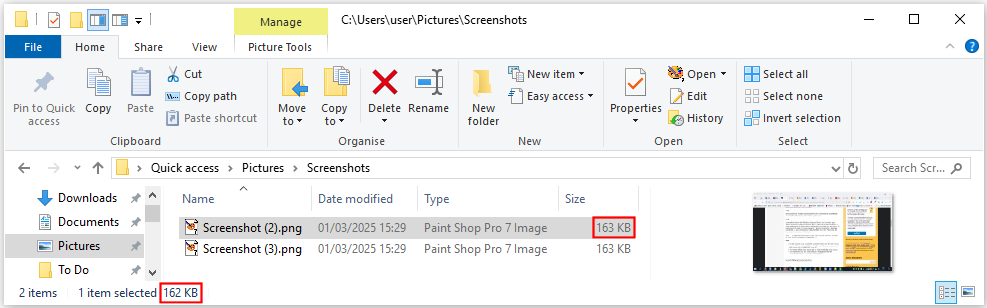
    • The screenshot is in the clipboard ready to be pasted AND the screenshot has been save to the following folder:


    %UserProfile%\Pictures\Screenshots


    • The screenshots files are named Screenshot (#) where # is the chronological order of screenshots saved and are saved in the PNG format. The screenshots will remain saved in that folder until you move or delete them.  I have screenshots taken 4 years ago.
    • Easy access to that folder by opening a Run Box (WinKey +R) and entering shell:Screenshots.
    • Screenshots taken with this auto save method are full screen screenshots only.


    Comments

    The best use of this type of screenshot is for unexpected error messages that later you wish you had taken a screenshot of to refer to the exact wording in the message.  When this happens and the error message appears press WinKey + Prt Scr and continue to handle the error.  Now you have that error message to refer to.

    HTH, Dana:))

    • This topic was modified 1 month, 3 weeks ago by Drcard:)).
    1 user thanked author for this post.
    Viewing 6 reply threads
    Author
    Replies
    • #2752312

      Thank you. I can’t believe I never knew this Winkey+PrtScr keyboard combo!

      The screen didn’t ‘dim for a second’ either time I tried it… so I was going to login just to post ‘nah… didn’t work’.

      However, I had Paint Shop Pro 7 open already so just did a paste… and there my screenshot was, straight from the clipboard.

      I checked  %UserProfile%\Pictures\Screenshots and there were both screenshots I had taken:

      screenshot_screenshot
      (even if Windows couldn’t agree on the file size)

      PS – Was Screenshot (1) somehow lost in the post?

    • #2752315

      The screen didn’t ‘dim for a second’ either time I tried it

      Strange, both of my Windows 10 Home dim when the screenshot is taken.

      PS – Was Screenshot (1) somehow lost in the post?

      I wouldn’t think so.  It may have been created by accident in the past and some “cleaning utilities”  target this folder to delete files and gain space.

      HTH, Dana:))

    • #2752319

      Strange, both of my Windows 10 Home dim when the screenshot is taken.

      I’m using an old Dell Latitude E7450 laptop running Win 10 Pro. Maybe it’s ‘cos it has an integrated GPU?

      I wouldn’t think so. It may have been created by accident in the past and some “cleaning utilities” target this folder to delete files and gain space.

      You must be right. I’ve just tried this on a refurbed Dell Latitude E7490 laptop which I’m (very slowly) preparing as a ‘daily driver’ replacement and Screenshot (1) was created… although, once again, the screen didn’t dim.

      This was a good tip… so thank you again. Now all I have to do is remember it. 🙂

      EDIT: Just tried it on my ThinkPad P50 laptop… and the screen did dim (although I have no idea which of its 2 GPUs it was using at the time)… so a Latitude quirk.

    • #2752323

      Hey Guys,

      You can control this behavior in the Snipping Tool settings menu.

      I have mine set to not copy to the clipboard.

      PrtScr or Win+Shift+S = open Snipping tool, lets me select what to save and also then gives me the option to open the snip and modify it and save to location of my choice.

      Win+PrtScr = Snip and save. Saves to %UserProfile%\Pictures\Screenshots (Win 11)
      \
      I also keep a shortcut to the Snipping tool in my start menu (using Start-All-Back) for when I want full control of everything. This is where you can access the menu to change settings.
      Snipping-Tool-Options

      May the Forces of good computing be with you!

      RG

      PowerShell & VBA Rule!
      Computer Specs

    • #2752346

      The screen didn’t ‘dim for a second’ either time I tried it

      Just tried it on my Windows 10 desktop and my Dell laptop and neither dimmed!

      I’m using an old Dell Latitude E7450 laptop running Win 10 Pro. Maybe it’s ‘cos it has an integrated GPU?

      Both of my PC’s use a separate Nvidia GPU instead of the integrated GPU so that doesn’t seem to be why it doesn’t dim.

      Maybe it’s got something to do with how long it takes to actually save the image?

    • #2752381

      I’ve been trying to capture the screenshot of a User Account Control (UAC) warning that just started popping up when I launch UCheck software updater (a known issue due to a digital certificate problem – see attached image). The Windows Key + Prt Sc method suggested in this topic didn’t work but I was finally able to capture it after following the instructions in the MakeUseOf article How to Take a Screenshot of UAC Prompts on Windows (i.e., by disabling the dimmed secure desktop in the UAC settings of my user account as shown below).

      Win-10-Pro-v22H2-User-Account-Control-UAC-Settings-Disable-Desktop-Dimming-01-Mar-2025

      Does anyone know of another way to capture a screenshot of a UAC warning without having to temporarily decrease the security of the UAC setting in your user account?
      ———-
      Dell Inspiron 15 5584 * 64-bit Win 10 Pro v22H2 build 19045.5487 * Firefox v135.0.1 * Microsoft Defender v4.18.24090.11-1.1.25010.7 * Malwarebytes Premium v5.2.7.167-1.0.5160 * Macrium Reflect Free v8.0.7783

    • #2752486

      Does anyone know of another way to capture a screenshot of a UAC warning without having to temporarily decrease the security of the UAC setting in your user account?

      No, that’s the purpose of the UAC…no other input from any app (possible malware) until the user has responded with an external input.   System is locked waiting on that input.

      Lowering the security is one way to get the screen capture. I simply take a picture with my phone and transfer to “screenshot” photo to my PC.

      BTW: There is a work around to avoid that UAC window when opening that or any other app that requires the UAC approval to run.  Use the Task Scheduler to pre-approve the action and prevent the need for the UAC window.  OR Switch to the Administrator account that does not use the UAC approval steps.

      HTH, Dana:))

      1 user thanked author for this post.
    Viewing 6 reply threads
    Reply To: Auto Save Windows Screenshots

    You can use BBCodes to format your content.
    Your account can't use all available BBCodes, they will be stripped before saving.

    Your information: