Veeam Agent for Linux is currently the only backup program of which I am aware that can write full image-style backups from within Linux, while you work. It is free for the basic edition, though you do have to register with your email to get the link. Be aware that the EULA is intended for business customers, and says that Veeam can send someone to inspect your PC for license verification purposes “within normal business hours.” Apparently, these types of audits and the EULA code that enables them are boilerplate when it comes to enterprise software, but for home users who don’t have a license (the unlicensed version is the free version), there would be nothing to inspect. I’m not worried about it, but be aware that it is there. They are free to come see my PC during my normal business hours, and since I don’t have a business, there are no business hours.
Veeam is a powerful program with many options, but you don’t have to concern yourself with that. Linux sysadmins will likely use scripts to automate this stuff, but we regular folks can just use the program’s quasi-graphical interface.
Veeam agent does not have a GUI, or graphical user interface. It uses the character-based display of the terminal, but that does not mean you will have to be typing in commands or struggling to remember how to do so. It’s a wizard-style menu, which most everyone will be familiar with. The only thing is that you have to use the keyboard, not the mouse. Not to worry; this is not going to be as bad as you might think.
Installing Veeam is another topic, but let me run through it really quick anyway. Go to the Veeam site, and select to download Veeam Agent for Linux free. You will have to create a Veeam account or log in with a social media account, unfortunately, but you can use a throwaway one if you like. Once you log in, you should be able to download a version for your Linux distro. The only one I have tried is the one for Ubuntu (which is also the one for Mint, Neon, Zorin, and the other Ubuntu derivatives). Download the .deb file, then run it. A .deb file is an installer for Debian-based distros (like Ubuntu). That will install the Veeam repo into your software/package manager. Refresh the package list, then look for ‘veeam’, and install that. It might take a little while for it to show in Synaptic or other graphical programs, and if it does, you can type these lines (hit enter after each one) from the terminal to get it sooner:
sudo apt update
sudo install veeam
Then, to start the program, type:
sudo veeam
and press enter. That will start the program. It is possible to set it up to run directly from your main or start menu with not much fuss, but that’s also another topic. For now, let us just do it with the command above!
The first thing you will see will be the license acceptance agreement. To place an X in the place where they want you to check, move the selection cursor to the place you want to mark and hit the space bar. It should already be on the first box it wants you to select. After the first box is marked, use the TAB key to move to the next one and hit the space again. TAB will always move the cursor to the next field, and when it gets to the last one and you press TAB again, it will start at the beginning again. You can use SHIFT TAB to go backwards. Press and release TAB until the cursor is on the NEXT button at the bottom. It should look like this:

Press ENTER to activate the buttons at the bottom. You can use [Prev] just like any wizard in Windows to go to the previous page. When you move to a new page, notice the > symbol in the left panel moving down to indicate where you are in the list.
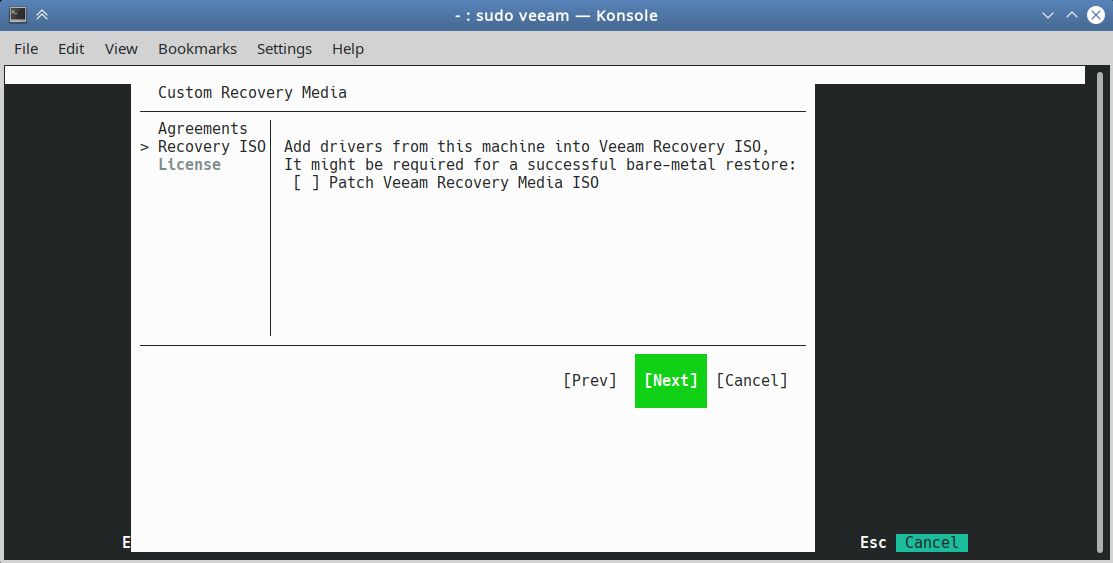
The next page will ask if you want to add drivers to the recovery media. I’ve never needed this, but it is possible you will need that to make the recovery work if you have somewhat uncommon hardware. For now, let’s skip that part and move on.
Press and release TAB until the cursor is on the NEXT button, as shown:
Then it will ask you for the license file, if you have a paid edition. It will look like this:

Press and release TAB until the cursor is on FINISH, then press Enter.
Now the program is ready to do some work. It will thank you for installing it:

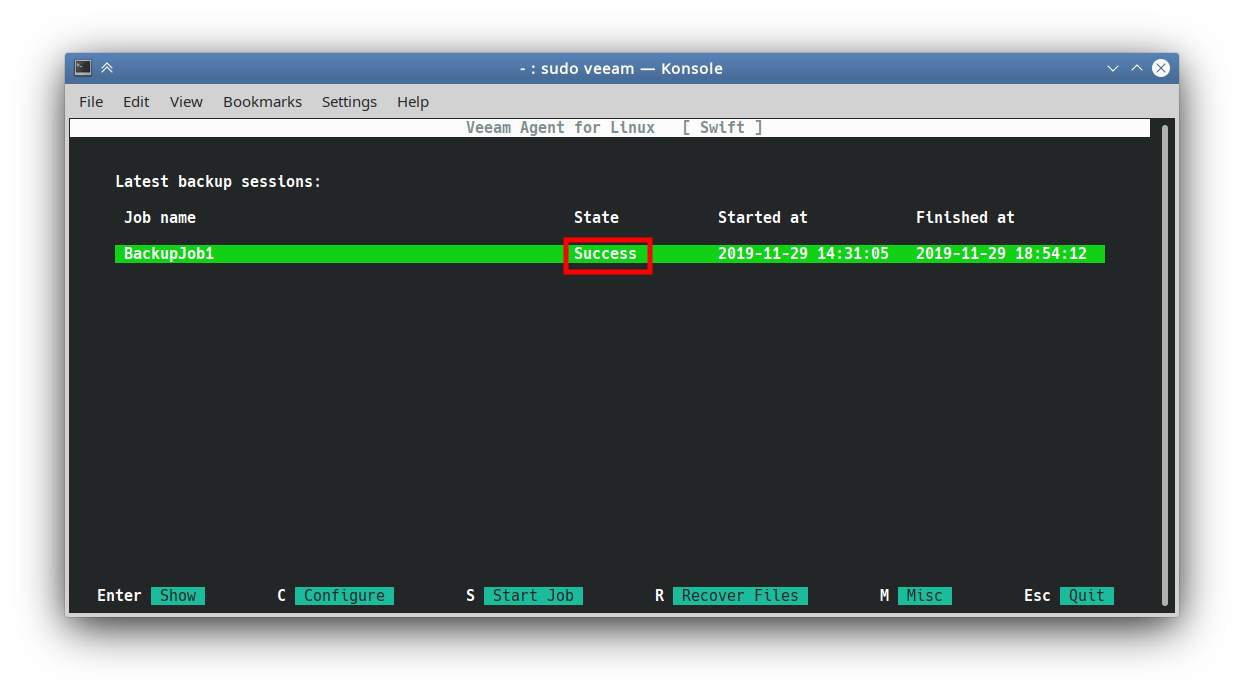
Press C to start the backup process, as the option on the bottom shows (configure).

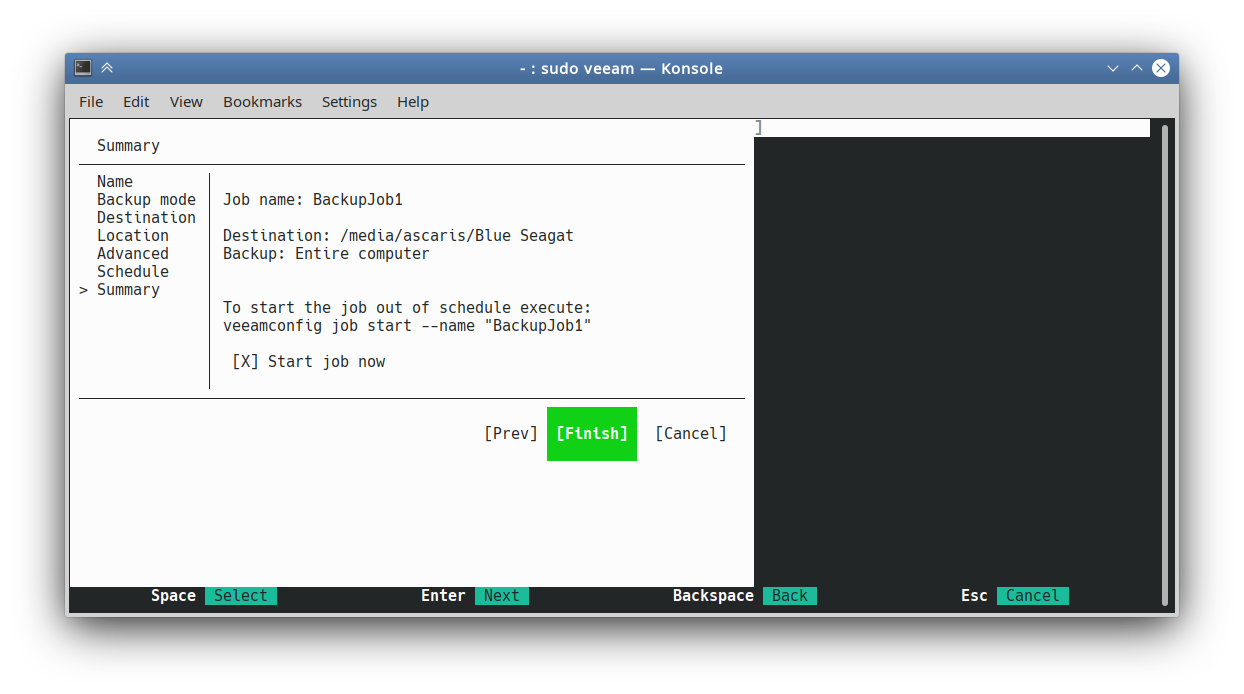
Into the box, enter the name you wish to use for your backup. You can call it anything you like, or just keep the default name. This will be the “job,” which just means the specific backup you want to make. In this version, we can only have one job defined at a time.
When you have finished entering the name, press TAB and release it as many times as it takes to get the cursor to NEXT, and press enter.
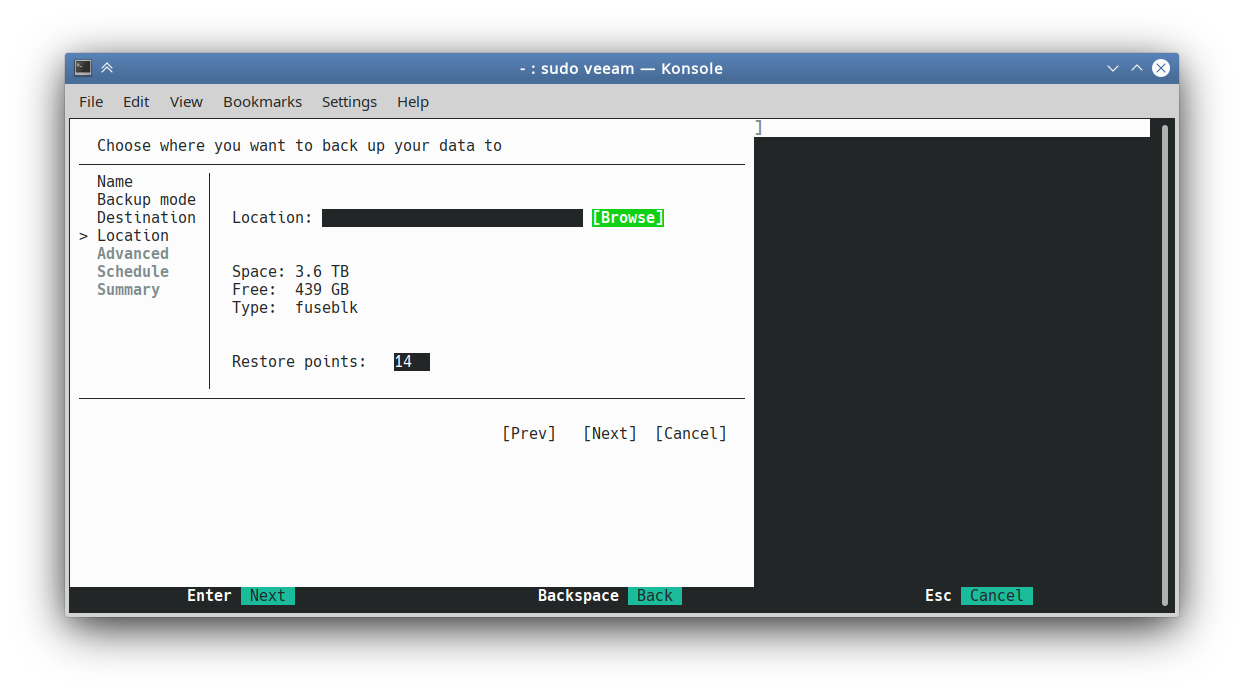
The next page will ask what you want to back up. For this tutorial, I’m going with the default option of backing up everything. It will look like this:
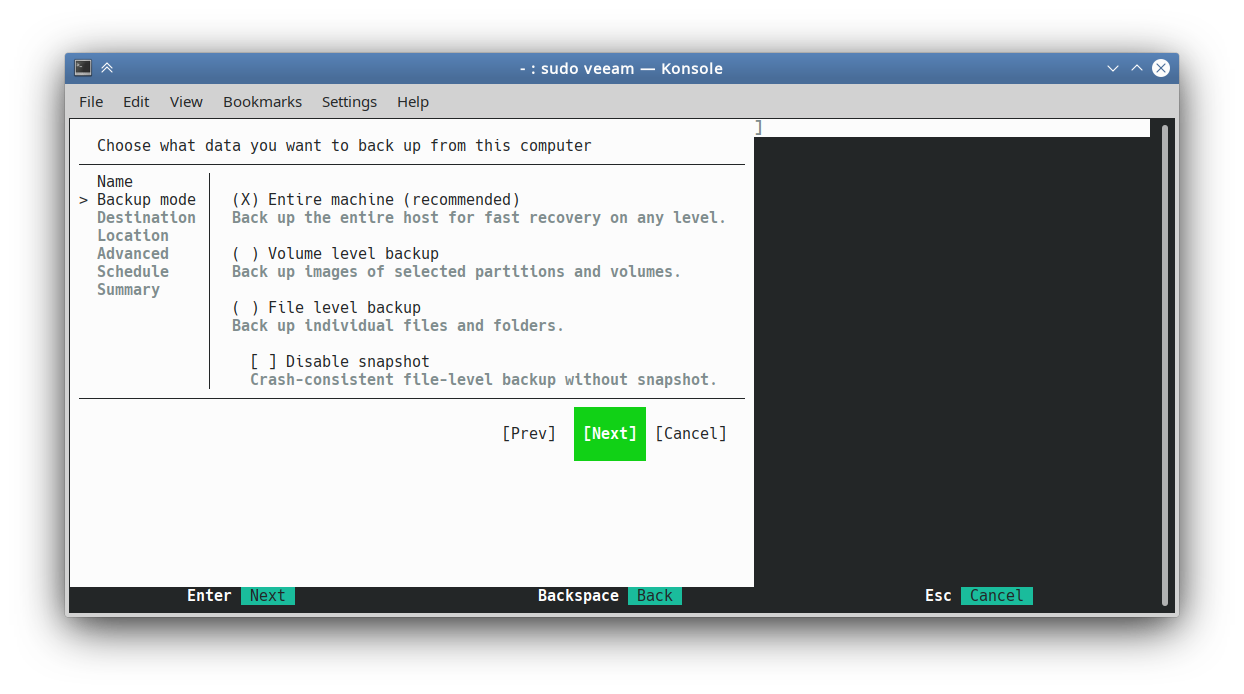
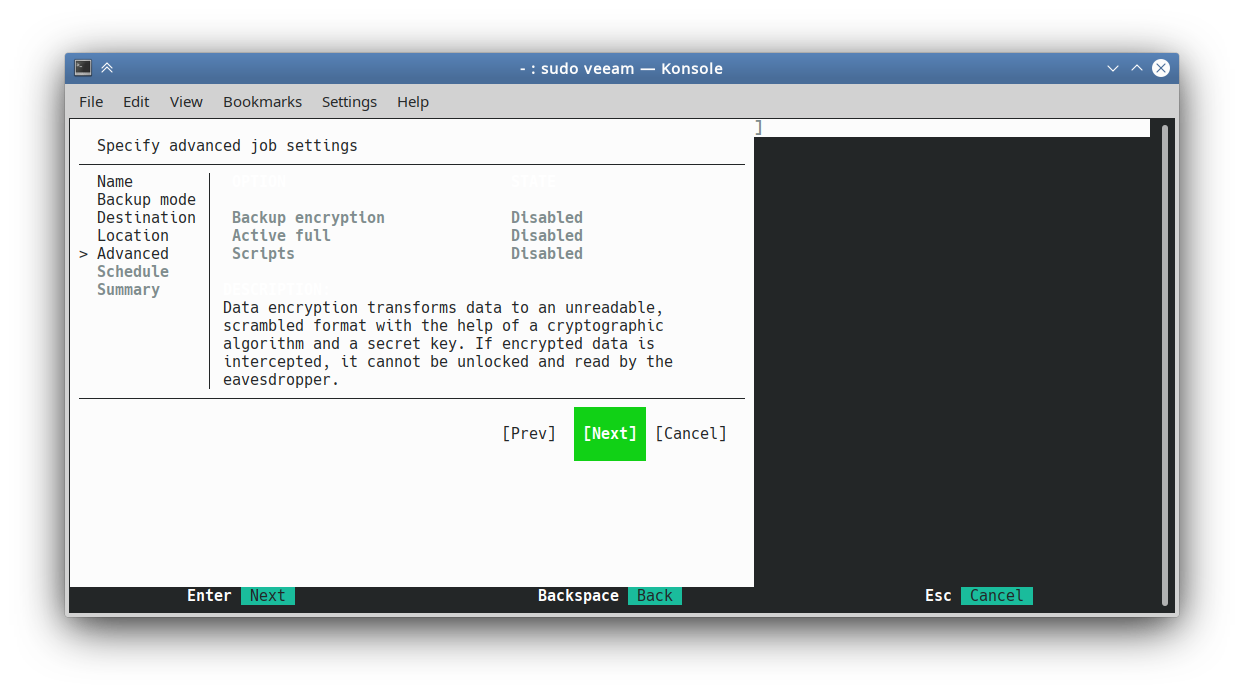
Then, keep tabbing it until you get to NEXT, and hit enter.
I’m out of attachments for this post, so I will leave a reply to this one and continue.
Dell XPS 13/9310, i5-1135G7/16GB, KDE Neon 6.2
XPG Xenia 15, i7-9750H/32GB & GTX1660ti, Kubuntu 24.04
Acer Swift Go 14, i5-1335U/16GB, Kubuntu 24.04 (and Win 11)
-
This topic was modified 5 years, 4 months ago by
.
-
This topic was modified 5 years, 4 months ago by
-
This topic was modified 5 years, 4 months ago by